Stencil Graffiti Guide: Art That Speaks Volumes

Why Stencil Graffiti Art Continues to Transform Urban Landscapes
Stencil graffiti art has evolved from underground rebellion to gallery-worthy masterpieces, combining the speed of street art with the precision of fine craftsmanship. This reproducible art form uses cut-out templates to create bold, impactful images that can be replicated quickly across multiple surfaces.
Key elements that define stencil graffiti art:
- Speed: Artists can reproduce complex designs up to 10 times faster than freehand methods
- Precision: Clean, crisp lines impossible to achieve with traditional spray painting
- Reproducibility: Single stencil can create dozens of identical pieces
- Layering: Multiple stencils combine to create depth and color variation
- Accessibility: Requires basic materials - cardboard, X-Acto knife, spray paint
The technique dates back to 1966 when French artist Ernest Pignon-Ernest created one of the first known stencil graffiti pieces. By the 1980s, artists like Blek le Rat were changing Paris walls, inspiring a generation that includes Banksy and Shepard Fairey. Today, stencil graffiti appears in over 100 major cities worldwide, with individual works selling for over $1 million at auction.
What sets stencil graffiti apart is its unique balance of street credibility and technical mastery. While traditional tags focus on quick lettering, stencil artists spend hours perfecting their templates to achieve museum-quality results on urban walls.
I’m Chris Higgins, a trained graphic artist who’s spent over a decade combining commercial design with street art influences through my work at Handshucked Designs. My experience with stencil graffiti art has taught me that the most powerful pieces merge bold illustration with simplified design - and often, a good sense of humor.
What Is Stencil Graffiti Art & Where Did It Come From?
Picture this: you’re walking down a busy street when a striking image catches your eye – maybe a rat scurrying across a brick wall, or a mysterious figure holding balloons. The lines are crisp, the message is clear, and you can’t help but wonder how the artist created something so detailed so quickly. Welcome to stencil graffiti art.
Stencil graffiti art works on a beautifully simple principle – creating positive images from negative space. Artists carefully cut shapes from materials like cardboard or plastic, then spray paint through these openings to reproduce their designs. Think of it like a cookie cutter, but for creating powerful visual statements on urban walls.
The magic lies in the reproducibility. While traditional freehand graffiti creates one-of-a-kind pieces, stencil artists can recreate the same striking image dozens of times with consistent quality. This efficiency became a game-changer for artists wanting to spread political messages or simply share their vision across entire neighborhoods.
The story begins in 1966 when French artist Ernest Pignon-Ernest created what many consider the first true stencil graffiti piece – a haunting image of a nuclear bomb victim. His work proved that stencils could transform complex, emotionally charged imagery into accessible public art that anyone could understand at a glance.
By the early 1980s, Blek le Rat was busy covering Paris with his iconic rat stencils, earning him the title “father of stencil graffiti.” His rats weren’t just random animals – they represented the unseen inhabitants of the city, multiplying and spreading just like his art across the urban landscape.
The technique gained worldwide recognition through artists like Banksy, whose mysterious identity and provocative imagery lifted stencil work from street vandalism to gallery-worthy art. Meanwhile, Shepard Fairey’s “HOPE” poster during the 2008 election showed how stencil-inspired design could influence mainstream culture and politics on a massive scale.
What started as a French political statement in the 1960s has now spread to over 100 major cities worldwide, with some pieces selling for over $1 million at auction. Not bad for an art form that began with cardboard and spray paint.
Why Stencil Graffiti Stands Apart
Speed is everything in street art, and stencil graffiti art delivers like no other technique. Where a complex freehand piece might take hours to complete (with plenty of time to get caught), a well-prepared stencil can reproduce the same design in just minutes.
The precision achievable with stencils creates results that look almost machine-made. Those clean, crisp lines are nearly impossible to achieve with traditional spray painting techniques. When you see a stencil piece, you’re looking at edges so sharp they could cut paper.
Multi-layer stencils take this precision to another level entirely. Artists can create incredibly detailed images with smooth color transitions and photorealistic effects that rival traditional paintings. We’re talking about street art that looks like it belongs in a museum – and increasingly, it does.
Milestones in Stencil Graffiti History
The birth of the movement happened in 1966 France when Ernest Pignon-Ernest created his nuclear victim stencil. This wasn’t just art – it was a powerful political statement that showed how stencils could communicate complex messages instantly.
The 1980s Paris explosion changed everything. Blek le Rat’s rat stencils sparked a movement that transformed the City of Light into an outdoor gallery. The technique jumped to London, where future legends like Banksy began developing their distinctive styles.
The 2000s gallery boom brought unprecedented mainstream acceptance. Banksy’s museum infiltrations and Shepard Fairey’s Obama campaign poster catapulted stencil graffiti into the spotlight. Over 200 galleries worldwide now exhibit stencil-based street art.
The digital era has brought new tools while preserving traditional techniques. Modern stencil artists increasingly use digital software for design development, though hand-cutting remains preferred for creating physical templates.
For more insight into the cultural impact of stencil graffiti, explore this comprehensive collection of graffiti stencils that documents the movement’s evolution from rebellious street art to recognized cultural phenomenon.
Essential Tools & Materials for Clean Cuts
Getting started with stencil graffiti art doesn’t require a massive investment, but choosing the right materials makes all the difference between amateur-looking results and professional-quality work that’ll make people stop and stare.
The foundation of any great stencil piece is the material you cut your template from. Card stock is where most artists begin their journey – it’s cheap, available everywhere, and perfect for testing out ideas. The downside? It won’t last long. After about 5-10 uses, you’ll need to cut a new one.
Acetate steps up the game considerably. This clear plastic material gives you cleaner lines and lasts about 20-30 uses with proper care. The transparency is a huge bonus when you’re lining up multiple layers – you can actually see where your previous colors landed.
For serious stencil artists, mylar is the gold standard. This tough plastic material can handle hundreds of uses without breaking down. Yes, it’s the most expensive option upfront, but when you’re planning to use the same design repeatedly, mylar pays for itself quickly.
| Material | Cost | Durability | Best For |
|---|---|---|---|
| Card Stock | Low | 5-10 uses | Beginners, one-time projects |
| Acetate | Medium | 20-30 uses | Multi-layer alignment, moderate reuse |
| Mylar | High | 100+ uses | Professional work, frequent reuse |
Your cutting tools can make or break your stencil work – literally. A sharp X-Acto knife with replaceable blades is absolutely essential. Dull blades don’t cut cleanly; they tear and drag, leaving rough edges that show up in your final piece. Keep extra blades handy and change them frequently.
Don’t underestimate the importance of a good cutting mat. Self-healing cutting mats provide consistent resistance and won’t develop grooves that interfere with straight lines. They also protect your work surface and extend blade life.
Spray paint quality directly affects your results. High-quality paints provide better coverage, more consistent color, and better durability. Look for low-pressure cans when working on detailed stencils – they give you much better control.
Low-tack adhesive is your secret weapon against paint bleed. A light coating of repositionable spray adhesive keeps your stencil tight against the surface without leaving residue behind.
Don’t forget protective gear. Spray paint fumes aren’t your friend, and neither are X-Acto blade accidents. A good respirator mask and cut-resistant gloves keep you creating art instead of visiting the emergency room.
For artists interested in exploring stencil techniques alongside other creative approaches, check out our art supplies and prints that showcase various artistic applications.
Surface Preparation & Compatible Paints
The surface you’re painting on dramatically affects your results, and stencil graffiti art works on almost anything – but preparation techniques vary widely.
Brick and concrete are the classic stencil surfaces. These porous materials provide excellent paint adhesion naturally. Clean them with a wire brush to remove loose material, then wipe with a damp cloth to remove dust.
Wood surfaces need light sanding to create tooth for paint adhesion. If you’re working on sealed or painted wood, you’ll need to sand through the finish slightly.
Metal surfaces require degreasing and light sanding. Use metal-specific primers to prevent rust and ensure your paint actually sticks.
Canvas and paper offer controlled environments perfect for practicing techniques. These surfaces let you perfect your spray technique and color combinations before moving to permanent installations.
Step-by-Step: Creating Your First Stencil Graffiti Art
Creating your first stencil graffiti art piece feels like open uping a secret code - suddenly, you can reproduce complex designs with speed and precision that would take hours to paint freehand. The process requires patience and planning, but the results are incredibly rewarding.
Start with design selection by choosing something simple yet bold. Your first stencil should feature large, clear shapes without tiny details that might break during cutting. Think iconic images - a silhouette, a simple logo, or basic geometric patterns work beautifully. High-contrast designs translate best to stencil format, so convert your chosen image to pure black and white, eliminating any gray areas.
Creating your template starts with printing your design at the desired size, leaving adequate borders around the edges. Tape the printed design securely to your stencil material, making sure nothing shifts during the cutting process. For transparent materials like acetate, you can trace directly onto the surface.
The cutting process separates beginners from experienced artists. Use a sharp X-Acto knife - dull blades tear rather than cut, creating ragged edges that show in your final work. Work on a proper cutting mat and cut with smooth, continuous strokes rather than sawing motions.
Start with interior cuts before working on exterior edges. This prevents your stencil from shifting as you remove material. Sharp corners often need multiple cuts from different angles, while curves require patience and gradual cutting to maintain smoothness.
Testing and refining your stencil saves heartbreak later. Before using it on your final surface, test on scrap material. This reveals structural weaknesses or areas where paint might bleed under edges. Make necessary repairs with tape or additional cutting.
Application day brings everything together. Prepare your workspace with proper ventilation and protective covering. Clean your target surface thoroughly and ensure it’s completely dry. Position your stencil and secure it with low-tack adhesive or painter’s tape.
Hold your spray can 6-8 inches from the surface and apply paint in thin, even coats. Multiple light coats always produce better results than single heavy applications. Allow each coat to dry before applying the next.
Removal and cleanup require careful timing. Remove the stencil while the paint is still slightly tacky - this prevents peeling when the stencil is lifted. Clean your stencil immediately with appropriate solvents, as dried paint makes future use difficult.
Breaking Down a Single-Layer Stencil
Understanding how stencil graffiti art actually works requires grasping the relationship between islands and bridges - the fundamental building blocks of any stencil design.
Islands are the cut-out areas where paint passes through to create your image. These negative spaces form the positive elements of your final design. Large islands create bold, graphic effects that read clearly from a distance, while smaller islands add detail and texture up close.
Bridges hold everything together - literally. These connecting pieces of material must be wide enough to prevent tearing during use but narrow enough to avoid interfering with your design. Strategic bridge placement often improves designs by creating interesting visual elements.
Avoiding floaters is essential for creating functional stencils. Floaters are isolated pieces that would fall out when the stencil is cut - like the center of the letter “O” or the middle of a circle. Every element of your design must connect to the main structure through bridges.
Going Multi-Color: Registration & Layering
Multi-color stencil graffiti art transforms simple designs into complex, layered masterpieces. Each color requires its own stencil, and these must align perfectly to create the intended image.
Registration marks serve as your navigation system for perfect alignment. Create small marks outside your design area that appear on each stencil layer. These marks help you position each subsequent stencil in exactly the same location as the previous ones.
Color order significantly affects your final result. Most artists work from light to dark colors, as darker colors can cover light ones but not vice versa. However, some prefer establishing their darkest elements first to create a strong foundation.
Dry time management prevents the heartbreak of smudged colors and lost crisp edges. Each layer must be completely dry before applying the next stencil. Use a hair dryer to speed drying if necessary, but don’t skip this crucial step.
The magic happens when multiple layers combine to create depth and dimension impossible with single-color work. Colors interact in unexpected ways, creating new hues where they overlap and adding visual richness that lifts your stencil graffiti art from simple reproduction to genuine artistic expression.
Advanced Techniques, Pro Tips & Maintenance
Once you’ve mastered the basics, stencil graffiti art becomes a playground for creative experimentation. The difference between good and great stencil work often comes down to understanding these subtle techniques that professional artists use to create gallery-worthy pieces.
Spray distance control is absolutely crucial for professional results. Keep your spray can exactly 6-8 inches from the surface - I can’t stress this enough. When you spray too close, you’ll get paint buildup and those dreaded drips that ruin hours of work. Too far away, and you lose coverage while creating a mess of overspray.
Fade and shadow effects transform flat stencil work into dimensional art. Create shadows by positioning a darker stencil slightly offset behind your main image - this simple trick adds incredible depth. For fade effects, start with heavy coverage and gradually lighten your spray pressure as you move across the stencil.
Mixed media integration is where stencil work gets really exciting. After your stencil paint dries, you can add hand-painted details that bring the piece to life. Some artists incorporate collage elements or even small objects into their stencil designs.
Stencil cleaning and maintenance might seem boring, but it’s what separates serious artists from weekend warriors. Clean your stencils immediately after use - and I mean immediately. Water-based paints come off easily with soap and water, while solvent-based paints need mineral spirits or specialized cleaners.
Storage methods can make or break your stencil collection. Store flat stencils between sheets of paper or cardboard to prevent them from sticking together. If you need to roll flexible materials for transport, be careful about creating permanent creases that will show up in your paint work.
Research on stencil longevity shows that properly maintained stencils can last for years with regular use. Professional artists often create multiple copies of their most-used stencils to ensure they’re never without their signature designs.
Achieving Crisp Edges Every Time
Clean, crisp edges are the hallmark of professional stencil graffiti art. These techniques ensure your work looks sharp and intentional, not sloppy or amateur.
Thin coat application is your secret weapon against paint bleed. Build up your color gradually with multiple light coats instead of trying to get full coverage in one pass. Heavy coats not only seep under stencil edges but also create drips and runs that can ruin your entire piece.
Adhesive tricks can save your edges without damaging surfaces. A light coating of repositionable spray adhesive on the back of your stencil creates better surface contact than tape alone. For delicate surfaces, test your adhesive in an inconspicuous area first.
Weather considerations become crucial when working outdoors. High humidity makes paint flow like water, seeping under even well-secured stencils. Extreme cold turns paint thick and unmanageable, while wind can lift stencil edges and scatter overspray everywhere.
Legal & Ethical Considerations
Stencil graffiti art exists in a complex world of laws, community relations, and artistic expression. Understanding these considerations protects you legally while building positive relationships with the communities where you work.
Permission-based work is always the safest and most ethical approach. Many property owners actually welcome quality street art that improves their buildings and neighborhoods. Approach owners with examples of your work and clear proposals for what you want to create.
Community outreach builds lasting support for street art projects. When you engage with local residents and business owners, you create allies who may protect your work and advocate for more public art.
Fines and legal consequences vary dramatically by location, so research local laws before creating any public art. Some cities have designated areas for legal street art, while others prosecute all unsanctioned public art as vandalism.
At Handshucked Art and Designs, we strongly advocate for responsible street art that improves communities rather than detracting from them. Our street art portfolio showcases how stencil techniques can create meaningful public art with proper permissions and community support.
Frequently Asked Questions About Stencil Graffiti Art
How is stencil graffiti art different from sticker bombing?
The difference between stencil graffiti art and sticker bombing comes down to permanence and artistic control. When you create stencil art, you’re applying paint directly through cut-out templates, making your artwork become part of the surface itself. It’s like tattooing the wall - the paint soaks in and becomes permanent.
Sticker bombing, on the other hand, involves slapping pre-made adhesive stickers onto surfaces. While stickers are definitely faster to apply (you can cover a lot of ground quickly), they’re also temporary. Weather, vandals, and city cleanup crews can remove stickers easily.
Stencil graffiti art gives you complete creative control over every aspect of your piece. You design it, cut it, choose your colors, and apply it exactly how you envision it. With stickers, you’re limited to what you’ve already printed or what’s available to buy.
The skill level differs significantly too. Stencil work requires planning, precision cutting, and spray technique mastery. Sticker bombing focuses more on quantity and strategic placement than artistic technique.
Can one stencil design be reused indefinitely?
Unfortunately, no stencil lasts forever, but with proper care, some can come pretty close. The lifespan of your stencil depends heavily on what material you choose and how well you treat it.
Basic card stock stencils are like paper plates - cheap and convenient, but they’ll give you maybe 5-10 uses before they start falling apart. The spray paint moisture makes them soggy, and the cutting edges get rough quickly.
Acetate stencils are the middle ground, lasting about 20-30 uses if you clean them properly after each session. They’re transparent too, which makes lining up multi-layer designs much easier.
Mylar stencils are the workhorses of the stencil world. These plastic templates can handle hundreds of uses when maintained properly. Professional stencil graffiti art creators often invest in mylar because even though it costs more upfront, it pays for itself over time.
The key to longevity is immediate cleaning after use and proper storage. Paint buildup is your stencil’s worst enemy - it makes edges rough and can cause tearing. Many artists create backup copies of their favorite designs just to be safe.
Is it possible to remove stencil graffiti without damaging the wall?
Removing stencil graffiti art is definitely possible, but success depends on several factors - and timing is everything. Fresh paint is always easier to remove than paint that’s been sitting for months or years.
Water-based paints are your best friend if you need to remove stencil work. Soap, water, and some elbow grease can often do the trick, especially on smooth surfaces like metal or glass. It’s like cleaning up after a painting project - the sooner you tackle it, the better your results.
Solvent-based paints require more aggressive approaches. Chemical paint strippers work, but they can also damage the underlying surface. Sandblasting is effective but definitely falls into the “nuclear option” category.
The surface material makes a huge difference. Smooth surfaces like painted metal or glass clean up relatively well because the paint sits on top rather than soaking in. Porous surfaces like brick or concrete are much more challenging because the paint penetrates into the material itself.
Professional restoration services can remove most stencil work, but complete restoration often means repainting or refinishing the entire surface. It’s one reason why getting proper permission for your stencil graffiti art projects is so important - it saves everyone the headache of removal later.
Conclusion
Stencil graffiti art has come a long way from its rebellious beginnings in 1960s France to become a respected art form that bridges street culture and fine art galleries. What started as a quick way to spread political messages has evolved into a sophisticated medium that demands both technical skill and creative vision.
The journey from cutting your first simple stencil to creating complex multi-layer masterpieces is incredibly rewarding. Each technique we’ve explored - from understanding the relationship between islands and bridges to mastering spray distance and color layering - builds on the last to create a complete artistic toolkit.
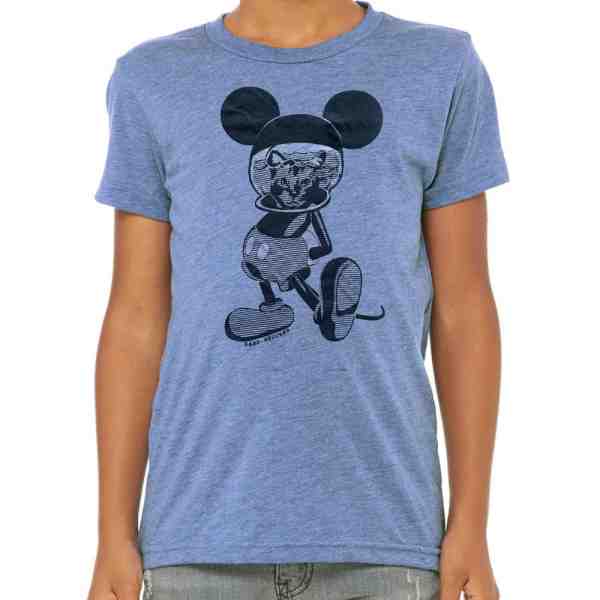
Here in Key West, our work at Handshucked Art and Designs has shown us how stencil graffiti art techniques can transform everything from hand-printed apparel to community murals. Our projects in Stock Island and Bahama Village have demonstrated the power of stencil work to create meaningful connections between artists and their communities.
The beauty of stencil art lies in its accessibility. You don’t need expensive equipment or years of training to create impactful work. A sharp blade, some cardboard, and a can of spray paint can produce results that rival pieces selling for thousands in galleries. Yet there’s always room to grow, refine, and push the boundaries of what’s possible.
What makes stencil work truly special is its ability to multiply impact. Unlike one-off paintings, a well-made stencil can reproduce your message dozens of times while maintaining consistent quality. This reproducibility was crucial to the medium’s development and remains one of its greatest strengths.
As you begin your own stencil journey, every master started with shaky hands and imperfect cuts. The key is to start simple and practice regularly. Create test pieces on scrap materials before committing to permanent surfaces. Most importantly, always respect the communities where you work and seek permission whenever possible.
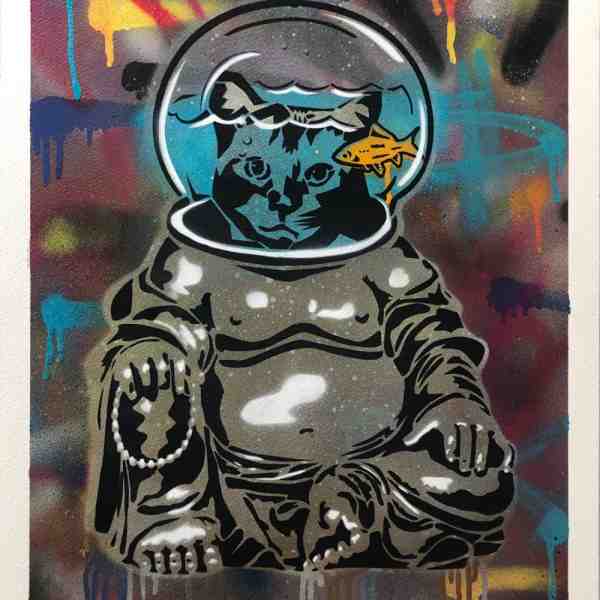
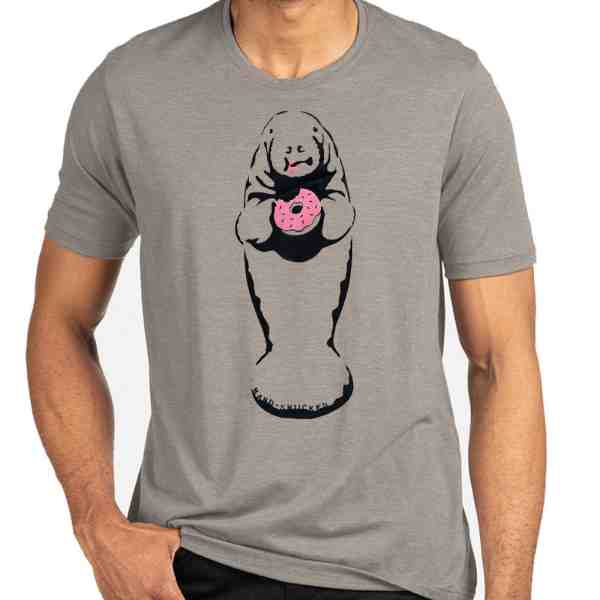
We encourage you to explore our art prints collection to see how stencil-inspired techniques translate across different mediums. From our “Lost Cat” series to the “Hungry Manatee” designs, these works show how stencil principles can create distinctive art that resonates with audiences.
The world needs more thoughtful artists who understand that creating public art comes with both power and responsibility. Start cutting, start spraying, and start making your mark on the world - one stencil at a time.