Design Your Space: Best Stencil Designs to Buy Now
What is Stencil Design? Quick Guide & Top Picks
Stencil design is the art of creating cut-out patterns that let you paint or apply designs onto surfaces quickly and cleanly. If you’re looking to buy stencil designs to transform your walls, furniture, fabrics, or DIY projects, here’s what you need to know:
Top things to consider when buying stencil design:
- Purpose: Choose designs based on your project—wall murals, furniture accents, fabric art, or business branding.
- Type: Pick from single-layer (simple), multi-layer (for color depth), reusable (durable), or disposable stencils.
- Material: Popular options include mylar, acetate, vinyl, and cardstock for different durability and flexibility needs.
- Size: Match the stencil size to your project area for best results.
- Style: From vintage florals and modern geometric to playful typography and custom logos, select a design that reflects your taste.
- Tools: Make sure you have suitable paint, brushes, rollers, or spray for your chosen stencil.
Whether you’re hunting for a bold geometric pattern or a custom logo, our guide will help you find the best stencil designs to buy right now—so you can add unique, handcrafted style to your home or creative space.
I’m Chris Higgins, founder of Handshucked Art and Designs. After over a decade as a commercial designer and years spent crafting original stencil design work, I’m excited to guide you through the best picks and expert tips for your next project.
What to Know Before Buying Stencil Designs
Getting the right stencil design isn’t just about picking something pretty—it’s about understanding what works best for your specific project. Trust me, I’ve learned this the hard way through years of trial and error in my own design work.
Let’s start with the basics. Single-layer stencils are your best friend if you’re just starting out. They’re simple, quick to use, and perfect for clean text or basic patterns. Think of them as the reliable pickup truck of the stencil world—they get the job done without fuss.
Multi-layer stencils are where things get exciting. These use separate layers for each color, creating designs with real depth and professional polish. They take more time and patience, but the results are worth it when you want something that looks like it came from a high-end boutique.
Here’s something most people don’t think about until it’s too late: sizing. I can’t tell you how many times I’ve seen someone fall in love with a tiny stencil pattern, only to realize it looks completely lost on their big living room wall. Always measure your space first and think about how the pattern will flow across your surface.
The tools you need depend on how deep you want to dive. A basic craft knife and cutting mat will handle most projects, but if you’re planning bigger things, a craft cutter or laser cutter gives you precision that’s hard to beat by hand.
Paint selection matters more than you might expect. Wall paint works great for walls (obviously), but fabric needs special fabric ink, and glass projects call for etching materials. Each surface has its own personality, and using the right paint makes all the difference.
Safety isn’t the most exciting topic, but it’s important—especially with spray paints. Make sure you have good ventilation, and don’t skip the protective gear. Your lungs will thank you later. Scientific research on safe paint ventilation covers all the details if you want to dive deeper.
And hey, if you’re curious about where stenciling fits into the bigger art world, check out our street art section for some inspiration.
Choosing the Right Material
The material your stencil is made from can make or break your project. I’ve used them all, and each has its sweet spot.
Mylar is the champion of reusable stencils. This plastic material bends without breaking, resists paint buildup, and cleans up like a dream. It’s my go-to for detailed work or when I know I’ll be using the same design multiple times. The durability is outstanding—I have mylar stencils that are still going strong after dozens of uses.
Acetate gives you similar benefits but costs less upfront. The transparency is actually a bonus because you can see exactly where you’re placing your design. It’s not quite as tough as mylar, but for most home projects, it’s more than adequate.
Vinyl shines when you need precision. The adhesive backing sticks securely to prevent paint bleed, then peels off cleanly. This flexibility makes it perfect for curved surfaces or anywhere you need crisp, clean lines.
Cardstock is the budget option that still gets results. It’s basically disposable after one or two uses, but it’s perfect for testing ideas or quick projects. Just make sure you get the heavy stuff—thin cardstock will warp and tear when it gets wet.
Essential Tools & Supplies
Having the right tools transforms stenciling from frustrating to fun. You don’t need to break the bank, but a few key items make all the difference.
A sharp craft knife is absolutely essential. Dull blades tear your material and create messy edges that show up in your final design. Pair it with a good cutting mat—the self-healing kind protects your table and keeps your blade sharper longer.
Low-tack spray is your secret weapon for keeping stencils in place without damaging your surface. I learned this one the hard way when I had to repaint a wall after using regular adhesive.
For application, a stipple brush gives you complete control for detailed work, while a sponge roller covers large areas quickly and evenly. Both have their place in your toolkit.
Keep cleanup supplies handy—nothing ruins a good stencil faster than dried paint. A few damp cloths or baby wipes will save you hours of scraping later.
Best Stencil Design Picks for Every Project
Ready for the fun part? Let’s explore our favorite stencil design picks that can help you turn any ordinary surface into something uniquely yours. Whether you’re a DIY newbie or a seasoned maker, these designs are chosen for their versatility, impact, and ease of use.
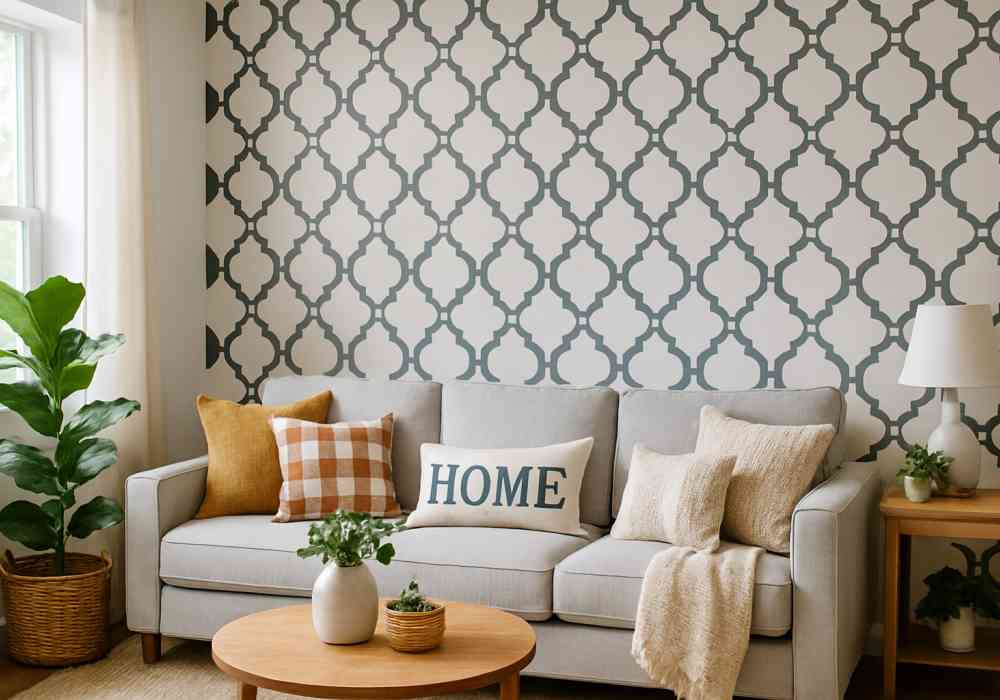
Walk into any trend-forward home and you’ll spot some of these popular motifs: botanical patterns, bold geometrics, and custom typography. If you’re longing for those breezy, coastal vibes, look for stencils with palm fronds, coral, or anything inspired by the ocean—right at home in Key West, where Handshucked Designs is based. Meanwhile, minimalist and geometric stencil patterns are a go-to for modern spaces, and vintage florals bring that soft, timeless touch to farmhouse or shabby-chic looks.
[IMAGE] gallery of featured stencil patterns; trending-designs; minimalist; boho; coastal; botanical; geometric; typography
Vintage Florals Stencil Design
Florals are a classic for a reason—they never go out of style! Vintage-inspired flower motifs instantly add warmth and charm, whether you use them for accent walls, upcycled furniture, or decorative pillows.
Our large-format floral stencils are designed to make a statement but won’t overpower a small space. Just be sure to pick a design with enough contrast, so every petal and leaf stands out after painting. These stencils are perfect for bedrooms, nurseries, or any room where you want a gentle, nostalgic feel. Try them on a tired dresser or even a headboard—suddenly, you’ve got a piece nobody else has.
Modern Geometric Stencil Design
Love clean lines and a bit of mid-century flair? Geometric stencil design patterns are your best friend. These bold, repeating shapes—think hexagons, triangles, and circles—work on entire walls, as stylish borders, or even as an accent on cabinets and floors.
The trick with geometrics is getting your alignment just right, but don’t stress: even small mistakes usually blend into the larger pattern. These designs suit contemporary homes and offices especially well. Plus, they’re super beginner-friendly—great news if you’re still building your confidence with a stencil brush or roller.
Playful Typography Stencil Design
Words matter—especially when you can stencil them on your wall! Typography stencils open up a world of possibilities for personalizing your space. Go for full alphabet sets if you want to craft custom quotes, names, or messages, or pick ready-made sayings to save time.
Nurseries often get the “Dream Big” treatment, but don’t forget the kitchen (“Eat Well, Laugh Often”) or your home office (a little motivation never hurts!). The most important thing is picking a font style that matches your room: modern and simple for sleek spaces, or go vintage for cozy nooks.
Multi-Layer Artistic Stencil Design
Want to get a true artist’s effect? Multi-layer stencil design gives you rich, multi-color artwork with serious wow factor. Each layer adds a new color or detail, and with registration marks to help you line things up, the results look professional, even if you’re not a pro.
The process starts with a base layer, then adds mid-tones, fine details, and even shadows for extra depth. Just remember: patience pays off. Let each layer dry before moving to the next, and you’ll be rewarded with a piece that has real dimension.
A typical set includes:
- Base/background layer
- Main design (mid-tone) layer
- Detail layer
- Shadow/accent layer
Custom Logo & Branding Stencil Design
If you’re a small business, your brand deserves to shine—on packaging, signage, and even event displays. Custom logo stencils make it easy and affordable to leave your mark anywhere, from boxes and bags to storefront windows.
At Handshucked Art and Designs, we’ve seen how much impact a well-placed logo can have. Stenciled branding feels personal, handmade, and memorable—perfect for businesses that value authenticity and want to stand out at markets, pop-up shops, or even just on social media.
No matter your project, the right stencil design can help you express yourself, transform your space, and make something truly one-of-a-kind. Want more inspiration or ready to get started? Explore our full collection of stencil designs and see where your creativity takes you!
How to Use, Clean & Store Your Stencils Like a Pro
When it comes to stencil design, your results really depend on how you use and care for your stencils. A little know-how goes a long way—whether you’re aiming for crisp wall art, a hand-printed shirt, or a perfectly branded box.
Applying stencils can be as simple or as detailed as you want. Spray paint gives you fast, smooth coverage—just remember to hold the can about 6–8 inches from your surface, and always use light, even sprays. It’s tempting to go heavy, but trust me, thin coats prevent those annoying drips and keep the paint from bleeding under the edges.
If you’re after more control, especially on textured or smaller surfaces, a stencil brush is your best friend. Use a stippling motion (straight up and down—think “tap tap tap,” not “swish swish”), and start with a small amount of paint. You can always add more, but you can’t take away a heavy blob!
To make things even clearer, here’s a quick comparison of the two main application methods:
| Method | Speed | Control | Best For | Skill Level |
|---|---|---|---|---|
| Spray Paint | Fast | Medium | Large areas, smooth finish | Intermediate |
| Stencil Brush | Slow | High | Details, textured surfaces | Beginner |
No matter what method you use, remember: less is more when it comes to paint. That’s the secret to sharp, professional-looking edges!
Working on different surfaces? Each type needs a little special love. Walls are often the easiest—just use a low-tack spray adhesive to keep your stencil snug and test your paints in a hidden spot first. Furniture can be tricky with all those curves and corners, so flexible materials like mylar or vinyl make life easier. And always give glossy surfaces a quick sanding before you start.
For fabric, pick fabric-specific paint or ink (so your design stays put, even after washing). Pre-wash your fabric to remove finishes, and heat-set your design with an iron following the paint’s instructions. If you’re brave enough to stencil on glass, clean it thoroughly first (a little rubbing alcohol does wonders). Use etching cream for a permanent look, or removable vinyl for something temporary and fun.
Metal needs a good cleaning and maybe a coat of primer, especially if you’re working outdoors or on something rusty. And with concrete, sealing the surface first prevents your paint from soaking in too much—stains work beautifully for a more permanent outdoor design.
After your creative session, caring for your reusable stencils is key. Clean them right away—dried paint is tough to remove and can damage those lovely details. For water-based paints, a gentle wash in warm soapy water usually does the trick. For tougher, oil-based paints, you’ll need the right solvent (and good ventilation). Go easy with brushes so you don’t accidentally scrub off the finer cuts.
Dry your stencils completely before storing—moisture can warp or damage them over time. Lay them flat or hang them up, and tuck them into sleeves or folders so they stay safe and organized. Try to avoid extreme temperatures—no hot attics or damp basements!
Want to see stencil design in action? Check out our art section for inspiration, or explore modern tricks like this Easy 3D print stencil tutorial if you’re itching to combine traditional stenciling with new technology.
With a little practice—and the right care—your stencils will deliver crisp, creative results again and again. Dive in, experiment, and don’t be afraid to get a little paint on your hands. That’s where the magic happens!
Frequently Asked Questions about Stencil Design
How do I prevent paint bleed when stenciling?
Paint bleed is the number one frustration in stencil design, but the good news is, it’s totally avoidable with a few simple tricks. First, make sure your stencil is snug against your surface. Using a low-tack spray adhesive or adhesive-backed vinyl helps the stencil hug the wall, glass, or fabric, sealing those edges tight.
When it comes to paint, less really is more. Dip your brush or roller lightly, and dab off any extra paint on a paper towel before you touch the stencil. Heavy paint almost always finds a way to sneak under the edges, so keep it light and build up color gradually.
Technique matters too! If you’re using a brush, use a gentle dabbing, up-and-down “stipple” motion, not a sweeping side-to-side stroke, which can push paint underneath. For spray paint, hold the can about 6-8 inches away and use quick, light passes—you want a mist, not a downpour.
One last tip: pull the stencil off while the paint is still a little tacky. Waiting until it dries completely can sometimes peel or crack the design. Quick removal means crisper edges and less chance of mishaps.
Can I resize a stencil design without losing detail?
Resizing a stencil design can be a breeze—or a headache—depending on how much you change the size. Enlarging a design usually works well, and sometimes even makes the details pop more. Shrinking, though, is trickier; tiny details might get lost or muddled.
Digital stencils (especially vector-based ones) are your best friend here. They can be scaled up or down in your computer software with no loss of detail. Raster images, like JPEG or PNG, can get blurry or pixelated if you make them much bigger.
If you’re working with a physical stencil, photocopying or scanning and adjusting the size can work, but watch out for those delicate lines—they can disappear or blur if you go too small.
Think about your project: a design that looks great at 12 inches wide might not make the same impact at 6 inches—or could be way too much at 24 inches! When in doubt, pick a design that matches your project’s actual size, or reach out to Handshucked Art and Designs for custom resizing tips.
What’s the best way to create multi-color effects?
Multi-color stencil design opens up a whole new world of creative possibilities, but it does take a little planning (and patience!). Start by picking colors that look good together and map out which color goes where before you begin. Using just 2-3 colors makes things simpler your first time out.
Work from light to dark—lighter colors should go down first, so they don’t get muddied by darker shades later. Let each layer dry fully before moving to the next to prevent unwanted blending or smudging.
Registration marks are your secret weapon: tiny marks on each stencil layer that help line everything up perfectly. Mark them lightly with a pencil, and erase them once your masterpiece is complete.
For the best results, use a separate stencil layer for each color. This gives you the cleanest lines and the most vivid colors. If you want a softer effect, blend colors while they’re still wet, or gently overlap the edges for a subtle fade.
Creating that eye-catching, layered look is all about patience—so take your time, enjoy the process, and don’t forget to stand back and admire your work as it comes together. For even more inspiration and techniques, check out our art section, or try your hand at the Easy 3D print stencil tutorial.
Conclusion
There’s something magical about watching a plain wall transform with the simple sweep of paint through a stencil design. Whether you’re adding delicate florals to a bedroom or bold geometric patterns to a modern living space, stenciling gives you the power to create custom art that perfectly reflects your personality.
The beauty of stenciling lies in its accessibility. You don’t need years of artistic training or expensive equipment—just the right materials, proper technique, and a willingness to experiment. From our coastal perspective here in Key West, we’ve seen how stencil design can capture everything from tropical vibes to urban sophistication.
Remember those fundamentals we covered: mylar stencils for durability, proper paint application to prevent bleeding, and surface-specific techniques for professional results. These basics will serve you well whether you’re creating a statement wall or adding subtle accents to furniture pieces.
The projects you can tackle are truly endless. Transform tired furniture with vintage patterns, add inspiring quotes to your workspace, or create custom branding that makes your business stand out. We’ve watched customers turn simple stencils into stunning focal points that completely change how a room feels.
At Handshucked Art and Designs, we believe every space deserves that personal touch that makes it uniquely yours. Our island-inspired creativity meets practical design needs, offering patterns that work in everything from beach cottages to city apartments.
Ready to dive in? Start small with a single accent piece, then let your confidence grow with each project. The satisfaction of stepping back and admiring your handiwork never gets old—trust us on this one.
Handshucked Designs’ curated stencil picks make elevating any surface simple—explore the full collection and start designing your space today! More info about store section


