Stencil Secrets: Techniques for Perfect Art Every Time
Why Stencil Art Techniques Transform Your Creative Vision
Stencil art techniques open up a world of creative possibilities that have captivated artists for over 35,000 years. Whether you’re creating wall murals, custom T-shirts, or mixed-media masterpieces, mastering these fundamental methods will lift your artistic game.
Essential Stencil Art Techniques:
- Dry brushing - Light pouncing motion for sharp, clean edges
- Ink blending - Smooth color transitions and ombré effects
- Spray painting - Multi-layer designs with perfect registration
- Embossing - Raised textures using molding paste and heat
- Reverse stenciling - Negative space designs for unique looks
- Mixed-media layering - Combining stencils with wax, foils, and stamps
From ancient cave paintings to Banksy’s iconic street art, stencils have proven their staying power because they’re simple yet sophisticated. You can create complex, professional-looking designs without years of training - just the right techniques and practice.
I’m Chris Higgins, and after more than a decade as a commercial designer in Key West, I’ve finded that stencil art techniques form the backbone of many successful artistic projects. My work at Handshucked Designs combines bold illustration with graffiti and pop art elements, and stenciling has been essential to developing this distinctive style.
A Quick History & How Stencils Work
30,000 years ago, someone pressed their hand against a cave wall and blew pigment around it. When they lifted their hand, a perfect outline remained - and stencil art techniques were born. These ancient artists had finded something powerful: by blocking certain areas while letting paint flow through others, you could create precise, repeatable designs.

Fast forward to 8th century China, where artisans perfected stenciling on silk fabrics. The technique spread across cultures - Egyptian tomb painters used stencils for hieroglyphs, while Greek craftsmen created pottery patterns with remarkable consistency.
The 20th century brought real change. Henri Matisse revolutionized the pochoir method with his “Jazz” series in 1947. Then pop art exploded, with artists like Andy Warhol embracing stencils for mass-production magic in screenprinting.
Here’s how it works: a stencil is a mask with strategic cut-out areas. Paint flows through the openings while being blocked everywhere else. The secret lies in understanding islands (solid parts that stay put) and bridges (connecting pieces that hold everything together).
Latest research on the history of stenciling reveals that virtually every culture on Earth has used stenciling. From Eskimo sealskin prints to Islamic architectural patterns, this technique has proven its universal appeal.
Why Stencils Endure
Mass production was the original killer app. In the 1800s, traveling painters used stencils to quickly transform farmhouse walls into decorative masterpieces. What took days freehand could be finished in hours with stencils.
Today’s DIY movement has acceptd stenciling because you can achieve professional results without years of training. The cost-effectiveness is unbeatable - one well-made stencil creates hundreds of impressions. Durability seals the deal - modern 190-micron Mylar stencils are washable, reusable, and often outlast the projects they create.
Tools, Materials & Setup for Crisp Results
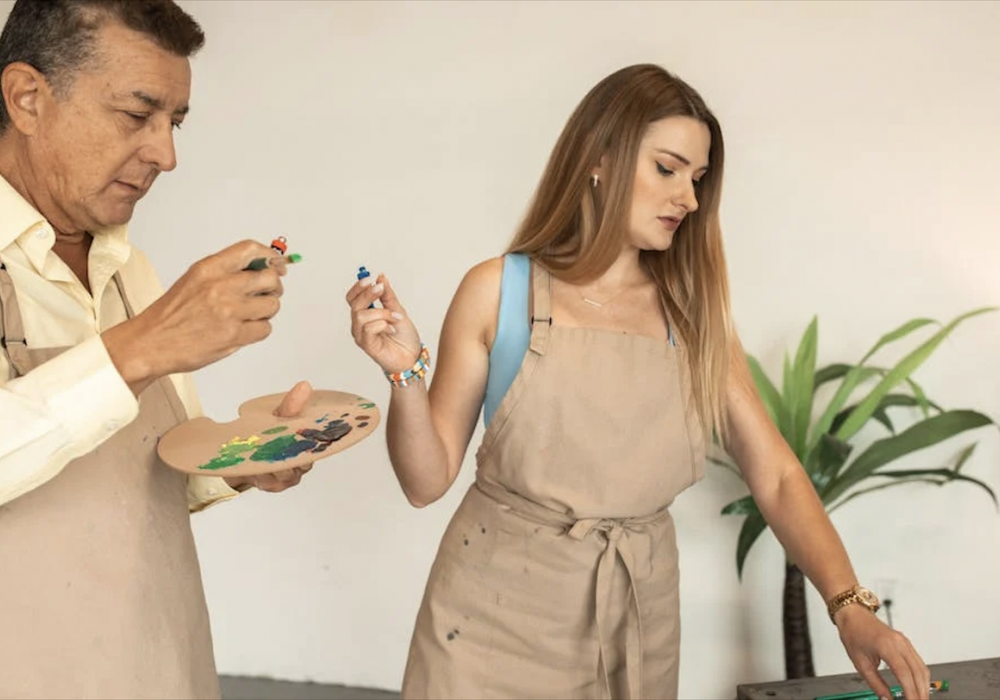
Getting stencil art techniques right starts with proper tools. After years creating street art in Key West, I’ve learned that materials make or break your final piece.
190-micron Mylar plastic is my go-to material. This clear, flexible material cuts cleanly, washes easily, and handles hundreds of uses without warping. For quick experiments, heavy cardstock works fine - it’s cheap and lets you test ideas without expensive investment.
Frisket film is perfect when you need precision. The adhesive backing prevents shifting - crucial for detailed work. For commercial applications, metal stencils are worth the investment despite higher cost.
| Material | Durability | Cost | Best For |
|---|---|---|---|
| Mylar (190µ) | Excellent | Medium | Reusable projects, fine details |
| Cardstock | Fair | Low | Practice, single-use designs |
| Metal | Outstanding | High | Commercial applications |
| Frisket Film | Good | High | Precision work, curved surfaces |
Your cutting tools matter equally. A sharp craft knife with replaceable blades is essential - dull blades tear instead of cut. Change blades frequently. A self-healing cutting mat (at least 18” x 24”) saves your work surface and keeps blades sharp longer.
For paint application, stencil brushes with stiff bristles give you control. Makeup sponge wedges work beautifully for gradients. Low-tack painter’s tape positions stencils without residue. Always wear a respirator mask with aerosol paints.
Surface & Paint Pairings
Acrylic paints are workhorses for canvas, wood, and primed surfaces. Chalk paints excel on walls and furniture, covering imperfections with smooth, matte finishes. For fabric, use specialized fabric inks that won’t crack after washing - heat-setting makes them permanent.
Aerosol paints work perfectly for large outdoor projects, providing even coverage and vibrant colors. Encaustic wax creates stunning dimensional effects. Always prime porous surfaces with gesso to prevent paint bleed.
More info about art supplies - I regularly share what’s working in our studio.
Stencil Art Techniques Masterclass
Mastering stencil art techniques is like learning a new language. Once you understand the basics, you can express almost anything.
Professional stencil work starts with proper layering and registration. Each color requires its own stencil, and these must align perfectly. We cut small registration marks - tiny crosses or dots - into each layer for precise alignment.
Preventing paint bleed is crucial for clean results. The golden rule? Less paint is always better. Start light and build coverage gradually - it’s easier to add more than fix bleeding.

Creative texture transforms basic reproduction into genuine art. By changing pressure, adjusting paint consistency, or switching tools, you create everything from subtle gradients to bold statements.
Our Street Art collection shows how these techniques work in real applications.
Ink Blending Basics
Ink blending creates sophisticated color transitions. Use quick-dry ink pads and round sponge applicators for even coverage without streaks.
Start with your lightest color, applying with gentle circular motions from edges toward center. While slightly tacky, introduce your next color. Work light to dark always - colors blend naturally without turning muddy.
Ombré effects look airbrushed but require no special equipment. Cover your area with base color, then gradually work in darker tones for natural gradients.
Dry Brushing & Pouncing for Clean Edges
The “woodpecker motion” produces the cleanest edges - rapid up-and-down pouncing that prevents paint from sneaking under stencil edges.
Load your brush, then remove most paint by dabbing on paper towels until almost dry. Apply through stencil using pouncing motion, building coverage with multiple light passes. Sharp, clean lines come from patience and consistency.
Spray Painting & Graffiti Layers
Aerosol application requires different technique but spectacular results. Keep your can 18 inches from surface, using short bursts rather than continuous spraying.
Multi-plate registration becomes critical with spray work. Each color needs its own stencil with perfect alignment. Work in calm conditions - even light breezes affect spray patterns.
Advanced Techniques: Mixed-Media & 3D Effects
Fiber paste applied through stencils creates substantial relief that catches light beautifully. Molding paste offers different options - tint before application or paint after drying.
Reverse stenciling applies paint to stencil back and transfers to surface, creating negative-space designs with unique character. Gel press plates help conserve paint while getting consistent transfers.
Mixed-media combinations create exciting possibilities. Encaustic wax over spray paint creates luminous, layered effects. Foil transfer adds metallic accents that catch light dramatically.
Designing & Cutting Your Own Custom Stencils
Creating your own stencils transforms you from template user to template maker. I start with digital vector files when possible - programs like Illustrator or free Inkscape create designs that stay crisp at any size.
Photo posterization turns favorite photos into stencils by converting gray tones into distinct black and white areas. Crank contrast to 100% and adjust brightness until you find the sweet spot between detail and cuttability.

Cricut and Silhouette machines excel for smaller, detailed projects. But learn hand-cutting with X-Acto knives for larger stencils and materials machines can’t handle.
The secret to hand-cutting is fresh blades. Change them the moment you feel resistance - dull blades tear instead of cut, ruining clean lines.
Avoiding islands requires planning during design. Islands are parts completely surrounded by cut-out areas (like the center of letter O). Plan connecting bridges as design elements, not afterthoughts.
Registration marks ensure multi-layer alignment. Simple crosshairs built into each layer keep everything lined up perfectly.
Check out our Prints Section for examples of designs that work beautifully as stencils.
Common Mistakes & How to Avoid Them
Paint bleed ruins more projects than anything else. Use less paint than you think necessary, secure stencils properly, and choose appropriate paint consistency.
Stencil shift creates ghosted double images. Low-tack tape or spray adhesive prevents this completely.
Dull blades cause tears and rough edges. Change at first sign of resistance - fresh blades are cheap compared to ruined stencils.
Creative Applications & Project Ideas
Stencil art techniques adapt to an amazing range of projects. Wall murals showcase large-scale possibilities - we always test small versions first to work out color relationships before scaling up.
Greeting cards demonstrate how stenciling creates professional results on budget. Layered stencils with ink blending produce cards rivaling expensive printed versions.
T-shirt customization opens up with fabric inks and heat-setting. We’ve created everything from band designs to business logos with incredible durability.
Upcycled furniture transforms with strategic stencil placement. Simple borders update old dressers, while bold patterns create statement pieces.
Artist Trading Cards at 2.5” x 3.5” are perfect for experimenting with miniature techniques and testing color combinations.
Our Art Section features pieces demonstrating these various applications.
Safe Practices, Cleaning & Storage
Non-toxic paints should be your go-to choice. Respirator protection is essential with spray paints - simple dust masks won’t cut it.
Clean stencils right after use with warm soapy water for water-based paints. Never scrub aggressively - delicate cut areas tear easily.
Flat storage between cardboard sheets prevents warping. Properly stored stencils handle hundreds of applications.
Frequently Asked Questions about Stenciling
After years teaching stencil art techniques in our Key West studio, these are the big three questions that trip up beginners.
How do I keep paint from bleeding?
Paint bleeding is totally avoidable once you know the tricks. Use way less paint than you think you need. Your brush should feel almost dry when starting - load it, then dab off most paint on paper towels.
Build coverage slowly with multiple light passes instead of trying for perfect color in one go. Stencil security matters equally - any shifting creates bleed marks. Low-tack tape or spray adhesive keeps everything locked in place.
What’s the best material for reusable stencils?
190-micron Mylar plastic wins for reusable stencils. It’s tough enough for hundreds of uses, flexible for curved surfaces, and cleans with soap and water.
Heavy cardstock works for testing designs or 10-20 impressions. It’s budget-friendly but don’t expect longevity. Metal stencils are ultimate for commercial work needing thousands of impressions.
Can I stencil on fabric and make it washable?
Absolutely! Fabric-specific inks and paints are non-negotiable for washable results. These stay flexible after drying, moving with fabric instead of cracking.
Heat-setting makes the difference between permanent art and disappointment. Follow manufacturer’s instructions exactly. Pre-wash fabric before stenciling to remove sizing chemicals and prevent shrinkage.
Conclusion
Your journey into stencil art techniques starts here. These methods have connected artists across thousands of years - from cave painters to today’s street artists changing city walls into galleries.
What makes stenciling special is how it grows with you. Dry brushing for greeting cards works equally well for bedroom walls. Ink blending on small canvases scales up for large murals. Every technique builds on others, expanding your creative possibilities.
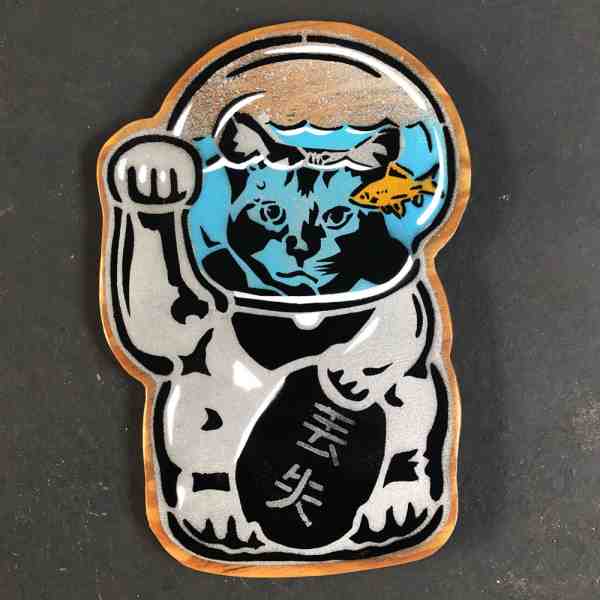
In our Key West studios at Handshucked Art and Designs, we see this evolution constantly. Artists starting with simple stencils often create complex multi-layer pieces within months. Our “Lost Cat” series began with basic experiments, developing into the distinctive WTFishbowl collection including Buddha Cat, Lucky Cat, and Lemonade designs.
The “Hungry Manatee” series showcases another side - how these techniques capture both bold graphics and subtle details, proving stenciling works for urban edge or refined elegance.
Don’t worry about perfection when starting. Even experienced artists have occasional paint bleed or registration struggles. We’ve learned to see “mistakes” as opportunities for new effects. Some popular designs came from happy accidents during learning.
Real magic happens when you stop following tutorials and start experimenting. Use these techniques as foundation, then push boundaries. Your unique artistic voice emerges through exploration.
Ready to see these techniques in action? Visit the full stencil art collection where you’ll find pieces demonstrating everything from basic dry brushing to complex mixed-media applications.
Start creating today - grab cardstock and a craft knife, or invest in proper Mylar if feeling ambitious. The most important step is the first one.