Stencil Your Style: Home Decor Ideas You’ll Love
Transform Your Space with DIY Stencil Magic
Stencil art home decor offers a budget-friendly way to personalize your living spaces with custom patterns, designs, and artwork. Here’s why it’s becoming increasingly popular:
- Cost-effective: Much cheaper than wallpaper or professional painting
- Reusable: Quality mylar stencils can be used multiple times
- Customizable: Choose any colors to match your existing décor
- No artistic skill required: Achieve professional-looking results as a beginner
- Versatile: Works on walls, furniture, floors, fabrics, and more
Stenciling has made a huge comeback in interior design, offering a perfect balance between DIY accessibility and high-end custom looks. Unlike wallpaper or vinyl decals, stencils allow unlimited color choices and can be applied to virtually any surface in your home.
What makes stencil art particularly appealing is its flexibility – the same stencil can create dramatically different effects depending on color choices, placement, and technique. From subtle tone-on-tone patterns for neat spaces to bold contrasting designs for statement walls, the possibilities are endless.
I’m Chris Higgins, a trained graphic artist who has spent over a decade creating custom designs, and I’ve incorporated stencil art home decor techniques into many original pieces for Handshucked Designs, combining bold illustration with elements of graffiti and pop art to create distinctive home accents.

Why Choose Stencils Over Wallpaper or Decals?
When you’re ready to refresh your space, the options can feel overwhelming. But here’s the thing about stencil art home decor - it offers that perfect sweet spot of affordability, creativity, and sustainability that other options just can’t match.
Let me break it down for you with this handy comparison:
| Feature | Stencils | Wallpaper | Vinyl Decals |
|---|---|---|---|
| Initial Cost | $15-$60 per stencil | $30-$300+ per roll | $20-$100 per design |
| Reusability | Yes, multiple projects | No, single use | No, single use |
| Color Options | Unlimited, your choice | Limited to print | Limited to print |
| Customization | High | Low | Medium |
| Application | DIY-friendly | Challenging | Easy |
| Removal | Paint over or strip | Steaming/scraping | Peeling (may damage walls) |
| Durability | Years | 5-15 years | 3-5 years |
| Eco-Friendliness | High (reusable) | Low | Low |
Most quality stencils are crafted from durable 10mil or 12mil mylar – that’s the secret to their flexibility and longevity. I’ve personally used the same stencils for multiple projects around my home, simply washing them between uses. That durability factor alone makes stencils a smarter investment for your decorating dollar.
As we often tell our customers at Handshucked Designs, “Why limit yourself to someone else’s color choices?” With stencils, you’re the designer – choosing exactly the right shades to complement your existing décor or make a bold statement.
Hidden Savings & Eco Perks
The environmental benefits of stenciling are my favorite “hidden feature” to share with customers. Think about it – a single quality stencil can transform dozens of spaces, dramatically reducing waste compared to single-use products.
When you choose stencil art home decor, you’re also saying goodbye to sticky glue residue that damages surfaces, eliminating the packaging waste from multiple wallpaper rolls, and gaining the flexibility to use low VOC paints if you’re environmentally conscious. It’s perfect for rentals too – just paint over when you move!
I smile every time I think about Maria, one of our Key West customers who transformed her entire beach cottage using just three different stencil patterns. By simply changing paint colors, she created a cohesive look throughout different rooms for less than the cost of wallpapering a single space.
Design Flexibility at Any Skill Level
Here’s what I love most about stenciling – it’s genuinely accessible to everyone. You don’t need to be Picasso to create something beautiful. As one of our workshop participants put it, “I can barely draw a stick figure, but my stenciled accent wall looks professional!”
With stencils, you can build confidence as you go. Start with a simple border, then work up to that statement wall you’ve been dreaming about. The flexibility is incredible – layer patterns for depth, create gorgeous ombré effects by blending colors, or rotate designs for varied impressions throughout your space.
I’ve watched people with zero artistic experience create stunning accent walls that look like professional murals, simply by using a well-designed stencil and taking their time. The pride on their faces when they step back to admire their work? Absolutely priceless.
At Handshucked Designs, we’ve incorporated stencil techniques into many of our original pieces, finding that perfect balance between precision and artistic expression. It’s that blend that makes stencil art home decor so special – professional results without professional training.
Types of Stencils for Every Surface
The variety of stencils available today is truly impressive. From delicate borders to room-changing all-over patterns, there’s a stencil for virtually every surface and style preference.

When I first started experimenting with stencil art home decor, I was amazed at the sheer diversity of options. You’ll find wall all-over patterns that transform entire rooms with repeating designs, and floor tile stencils specially formulated to withstand foot traffic on concrete, wood, or linoleum surfaces. For those looking to breathe new life into old furniture, furniture stencils offer smaller, detailed patterns perfect for cabinets, dressers, and tables.
The kitchen and hearth aren’t left out either – backsplash & fireplace stencils are designed to be heat-resistant, giving you the look of custom tile without the installation headache. One of my personal favorites are the XXL mandala stencils, which create stunning focal points up to 73 inches across. According to our research, Mandala-stencil.com is the only XXL stencils specialist in the world offering these impressive dimensions.
For those who like to refresh their space with the seasons, seasonal motifs provide holiday-themed designs for temporary decoration, while borders & quotes add that perfect finishing touch or inspirational message. Can’t find exactly what you need? Custom sizes can be created for those unique spaces that standard stencils won’t quite fit.
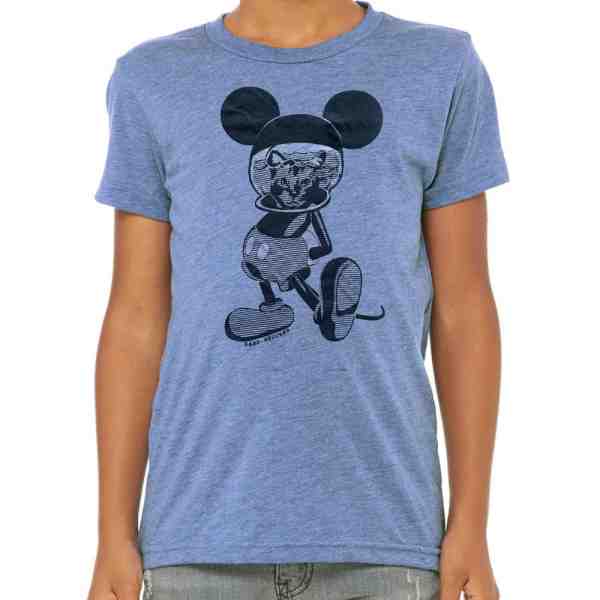
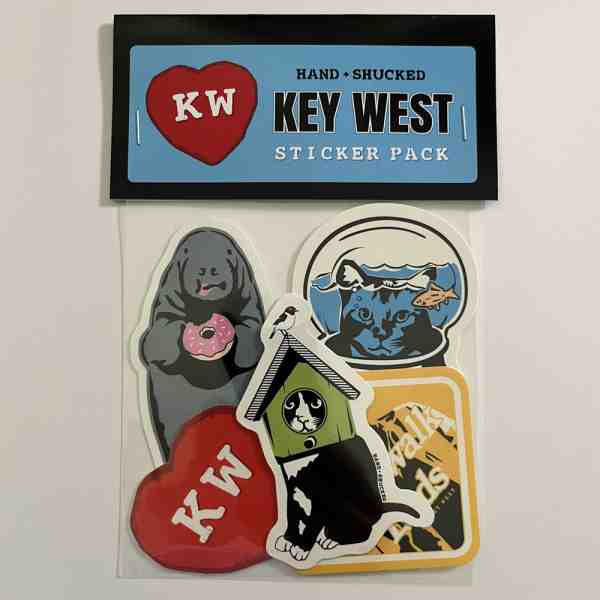
At Handshucked Designs, we’ve seen how beautifully our “Lost Cat” and “Hungry Manatee” series pair with stenciled backgrounds. The textured patterns create depth that makes our distinctive Key West-inspired artwork truly pop on your walls. For more ideas on simple stencil art techniques, check out this Small stencil guide.
Choosing Size & Scale
Selecting the right stencil size is crucial for achieving balanced, professional-looking results. I always tell first-time stencilers to measure twice before ordering any stencils. Nothing’s more frustrating than realizing your pattern is too small or large for your intended space.
For a focal wall, you’ll want to choose larger patterns that make a statement, while more subtle texture can be achieved with smaller repeating patterns. Always consider your ceiling height – taller rooms can handle larger designs without feeling overwhelmed.
I’ve found that optical balance matters more than exact measurements. A pattern that’s too small for a large wall will look busy and overwhelming, while an oversized pattern in a small space might lose its impact if only a partial repeat is visible. Before investing in stencils, try cutting paper templates to test the scale in your actual space – this simple step has saved many of my clients from sizing regrets.
Specialty & Custom Options
For truly unique spaces, custom stencils offer unlimited possibilities. Here in Key West, where architecture and style can be as distinctive as our sunsets, we’ve created extra-large murals spanning multiple walls for local businesses and homes alike.
The possibilities extend to laser-cut logos or family crests, one-off quotes in custom fonts, and patterns specially scaled to fit specific architectural features. At Handshucked Designs, we’ve created custom stencils for clients who wanted to incorporate local flora and fauna into their home decor. These one-of-a-kind designs become conversation pieces that reflect personal style and local heritage.
I remember one client who wanted a stencil featuring our native Key West chickens to complement their “Lost Cat” print – the combination created a whimsical corner that captured the essence of island living. If you’re considering a custom stencil that would pair beautifully with our original artwork, don’t hesitate to contact us directly. We love helping translate your vision into a workable stencil design that complements our distinctive style.
Mastering the Craft: Tools, Materials & Step-By-Step Success
Let’s face it – creating gorgeous stencil art home decor isn’t rocket science, but having the right tools will make your life so much easier! You don’t need to break the bank with professional supplies, but a few quality items will definitely boost your results and save you headaches.
Essential Tools & Materials:
Think of this as your stenciling starter kit: blue painter’s tape (the low-tack kind that won’t damage your walls), a smooth foam roller (4” or 6” works great), and some stiff-bristled stencil brushes for those detailed areas. You’ll also want a drop cloth (trust me on this one!), a level to keep things straight, and either latex or acrylic paint in a matte or satin finish.

For those multi-color magic moments, grab some blending sponges. Paper towels are your best friend for offloading excess paint, and keep some mild soap handy for cleaning your stencils afterward. Oh, and spray adhesive can be super helpful for clean edges, though it’s optional if you’re working on a budget.
I’ve found that latex and acrylic paints are the sweet spot for most stencil projects – they stick well to almost anything and clean up with just water. No harsh chemicals needed when your toddler decides to “help” with your project!
The 6 Basic Steps
Here’s your roadmap to stencil success – I promise it’s easier than you think:
Prepare your surface – Give it a good cleaning and apply a base coat if needed. This step is like making your bed before putting on fresh sheets – it just works better!
Secure your stencil – Use painter’s tape or a light mist of spray adhesive. The key word here is “light” – you want it to stay put but not become permanently bonded.
Load and offload paint – This is crucial! Grab just a bit of paint on your tool, then dab most of it off onto a paper towel. Less is more here, folks.
Apply with light pressure – Work from the outside in with a gentle dabbing motion. Think of it as patting a baby’s back, not scrubbing a dirty pot.
Lift carefully – Pull the stencil straight up to avoid smudges. It’s like removing a bandage – slow and steady wins the race.
Align for repeats – Use those handy registration marks or overlap technique for continuous patterns. This is where your level comes in handy!
When working with delicate surfaces, press that tape down gently. As one expert told me, “Press tape lightly to avoid tearing paper” – solid advice that’s saved many of my projects!
If you’re creating a rainbow masterpiece, patience is key. Let each color dry completely before adding the next. Your future self will thank you when colors stay crisp and clean instead of becoming a muddy mess.
Pro Tips for Crisp Lines & Zero Bleed
The most common stenciling frustration? Paint bleeding under those edges! Here’s how we avoid that at Handshucked Designs:
Use the dry brush technique – remove almost all paint from your brush or roller. Yes, it feels wrong at first, but trust the process! Work from the center outward to prevent paint from sneaking under edges.
Apply multiple light layers rather than one thick coat. It takes a bit longer but delivers those crisp, professional-looking lines everyone wants. And always hold that stencil firmly against your surface while working.
One trick I’ve learned from countless Key West projects: consider using a spray bottle to lightly mist water on adhesive-backed stencils for better grip. Works like a charm in our humid climate!
“Use less paint on the sponge to avoid seepage under stencil edges” is probably the single most valuable tip I can share. When I’m creating backgrounds for our “Lost Cat” or “Hungry Manatee” series, this approach ensures the stenciled elements complement rather than compete with the artwork.
At Handshucked Designs, we’ve learned that patience truly is the secret ingredient in successful stenciling. Rushing almost always leads to bleeding edges and disappointment. Take your time, especially when you’re learning, and you’ll create beautiful, clean designs that make your space uniquely yours.
Trending Stencil Art Home Decor Ideas Room-by-Room
Stencil art home decor has exploded in popularity, with creative applications popping up in every corner of the home. Let’s take a room-by-room tour of the most inspiring ways people are using stencils to transform their spaces.
Living Rooms & Bedrooms: Stencil Art Home Decor Hits
The rooms where we spend most of our time deserve special attention, and stencils deliver dramatic results without breaking the bank.
In living rooms, we’re seeing a huge trend toward feature walls that create conversation-starting focal points. One of our Key West clients transformed her living room with a large-scale palm frond stencil that perfectly frames her collection of our “Lost Cat” series – the tropical pattern and quirky art play off each other beautifully.
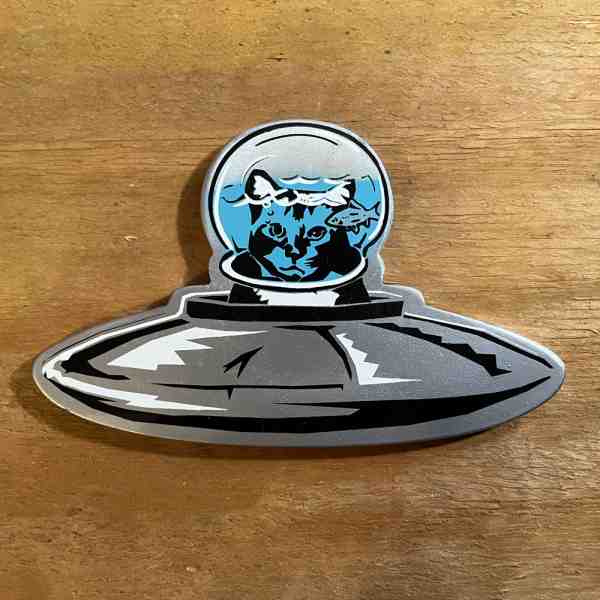
Ceiling medallions are another unexpected touch that draws the eye upward and adds architectural interest to otherwise plain spaces. These work especially well with our “WTFishbowl” pieces, creating a visual journey from floor to ceiling.
For bedrooms, faux headboards stenciled directly onto walls are both budget-friendly and striking. I recently helped a friend create a mandala headboard design that cost less than $50 but looks like a custom piece worth hundreds.
Layered gallery walls combine framed art with stenciled backgrounds for a cohesive, designer look. The stenciled pattern ties everything together while letting each piece shine – our “Buddha Cat” and “Lucky Cat” prints look especially striking against subtle geometric backgrounds.
For modern homes, geometric patterns like herringbone or chevron create clean, contemporary vibes, while damask repeats bring timeless elegance to traditional spaces. And don’t overlook the magic of ombré effects – the gradual color transitions create depth and movement that flat paint simply can’t match.

I’ve noticed that while bold colors make a statement, there’s also something incredibly sophisticated about tone-on-tone stenciling – using a glossy version of your wall color creates subtle texture that changes with the light throughout the day.
Outdoor & Specialty Spaces: Stencil Art Home Decor Expands
The stencil revolution has moved beyond interior walls to transform previously overlooked spaces around the home.
Concrete patios are being reimagined with stencils and exterior paint, creating the look of expensive imported tile for a fraction of the cost. One of our Bahama Village customers stenciled her entire backyard patio with a Cuban-inspired tile pattern that perfectly complements her outdoor gallery of our street art-inspired pieces.
Garden fences become whimsical backdrops when adorned with stenciled designs. Think butterflies, botanicals, or even abstract patterns that peek through climbing vines – they add personality year-round, even when gardens are dormant.
Garage floors are no longer just utilitarian spaces – epoxy coatings combined with stenciled patterns transform these hardworking surfaces into showpieces. One client in Stock Island stenciled compass roses throughout his garage/workshop, creating a nautical theme that celebrates Key West’s maritime heritage.
Planter boxes with stenciled details create curb appeal that coordinates beautifully with your home’s exterior. This small touch makes a surprisingly big impact on visitors’ first impressions.
For wellness spaces, XXL mandala stencils create focused energy in yoga or meditation rooms. The circular patterns naturally draw the eye inward, promoting concentration and calm – perfect companions to our more contemplative art pieces.
Home offices benefit from stenciled motivational quotes or subtle patterns that energize without distracting. And for the littlest family members, nurseries with gently stenciled patterns create personalized, soothing environments that grow with your child.
The trend of extending living spaces outdoors has made “HOW TO STENCIL A CONCRETE PATIO” one of the most searched-for tutorials online. It’s no wonder – these outdoor changes deliver massive visual impact while being surprisingly accessible for DIYers.
Throughout Key West, we’ve helped clients create stenciled spaces that reflect both their personal style and our island’s vibrant culture. These custom environments showcase our Handshucked Designs artwork in settings that feel authentic, creative, and distinctly tropical.
Stencil Care, Reuse & Common Mistakes to Avoid
Taking good care of your stencils isn’t just about being tidy—it’s about protecting your investment and ensuring consistent results across multiple projects. With proper maintenance, a quality stencil can become a trusted tool in your decorating arsenal for years to come.
Stencil Care & Maintenance:
When you finish a stencil art home decor project, don’t let exhaustion tempt you into leaving cleanup for later. The most important rule is to clean your stencils immediately after use, before paint has a chance to dry and become stubborn. A simple rinse with mild soap and lukewarm water is all it takes—no need for harsh chemicals that might damage the material.
After washing, gently pat your stencil dry with paper towels rather than rubbing, which can damage intricate details or bend the edges. Once dry, store your stencils either flat or gently rolled (never folded!) to prevent permanent creases that could affect future applications.

“I’ve been using the same set of mandala stencils for over three years now,” shares one of our Key West customers. “They still look almost new because I clean them right away, even when I’m tired and just want to admire my finished wall!”
Before each new project, take a moment to inspect your stencils for any torn edges or paint buildup that might affect your results. A quick check can save you from frustration later.
Common Mistakes to Avoid:
We’ve all been there—excited to start a new project and rushing ahead only to face disappointment. The number one mistake we see at Handshucked Designs is using too much paint. It seems counterintuitive, but less really is more when it comes to stenciling. A nearly-dry brush or roller creates the crispest lines with zero bleeding under edges.
Improper alignment is another common pitfall, especially with repeating patterns. Take time to line up registration marks carefully, and you’ll avoid those telltale gaps or overlaps that scream “amateur.”
Rushing the process might save you minutes but cost you hours of touch-up work. Let each section dry properly before moving on, and always lift your stencil straight up rather than peeling it back to prevent smudging.
Many first-timers skip surface preparation, leading to poor paint adhesion or bleed-through. A clean, properly primed surface makes all the difference in your final results.
Using the wrong paint can doom your project from the start. Some surfaces require specific formulations—outdoor spaces need exterior-grade products, while furniture might benefit from chalk paint or milk paint for the right look.
Heavy-handed application of spray adhesive creates a sticky mess that can damage both your stencil and your surface. A light mist is all you need—you should barely be able to feel the tackiness.
Here in the Florida Keys, we’ve learned that neglecting to clean stencils promptly is especially problematic. Our humid climate makes paint dry differently, and leaving a stencil uncleaned overnight can mean saying goodbye to those delicate details forever.
Finally, don’t make the mistake of attempting complex patterns first. Start with a simple border or small motif to build your confidence and technique before tackling that elaborate all-over pattern for your living room wall.
At Handshucked Designs, we’ve finded through many artistic trips that sometimes the best fix for a mistake is a fresh start. If you make a significant error, it’s usually cleaner to paint over the entire area and begin again rather than attempting spot touch-ups that might draw more attention to the problem.
For more detailed guidance on stencil techniques, check out How to Paint a Mandala Canvas for a step-by-step walkthrough that can help you avoid these common pitfalls.
Frequently Asked Questions about Stencil Art Home Decor
What materials work best for beginners?
If you’re new to stenciling, don’t worry—this craft is incredibly forgiving! I recommend starting with 10mil or 12mil mylar stencils, which are sturdy enough to handle a bit of fumbling without tearing. Foam rollers specifically made for stenciling will give you more consistent coverage than regular paint rollers, and stencil brushes with their stiff bristles make it easier to reach corners and edges.
For paint, stick with matte or satin finish acrylics—they’re more forgiving than glossy finishes which tend to highlight any little mistakes. And always use low-tack painter’s tape rather than regular masking tape, which can pull paint off your walls when removed.
“No artistic ability is needed; beginners get great results,” is something I hear all the time from first-time stencilers. It’s absolutely true! Start with a simpler pattern before tackling that intricate Moroccan design you’ve been eyeing.
How many times can a mylar stencil be reused?
Here’s where stenciling really shines as a budget-friendly option! Quality mylar stencils can be reused dozens or even hundreds of times if you treat them well. I’ve had customers tell me they’ve used the same stencil throughout their entire home, creating different looks just by changing colors.
The secret to longevity is simple: clean your stencils immediately after use (don’t let that paint dry!), store them flat or gently rolled (never folded), and handle them carefully during application and removal. Water-based paints are much easier to clean off than oil-based options.
At Handshucked Designs, we appreciate the sustainability aspect of stencils—one well-made stencil can replace countless rolls of wallpaper or packages of vinyl decals over its lifetime.
Can I stencil over textured walls or floors?
Absolutely yes! Textured surfaces just require a slightly different approach. For walls with light texture (like orange peel), swap your roller for a stencil brush and use a dabbing motion to work the paint into all those tiny crevices. Press your stencil firmly against the surface and consider using a light mist of spray adhesive to keep it in place.
Will there be some paint seepage? Probably. But here’s the secret—accept it! That slight imperfection is what gives stenciled textured walls their handcrafted, artisanal charm. It’s not a mistake; it’s character.
For heavily textured surfaces like popcorn ceilings or heavy stucco, you might want to consider skim-coating first. But I’ve seen gorgeous stencil work on everything from rough stucco walls to textured wallpaper in our Key West projects. The key is adjusting your expectations—textured stenciling has a beautiful, organic quality that smooth-surface stenciling doesn’t.
What’s the best way to align repeating patterns?
Pattern alignment is where beginners often get nervous, but it’s actually quite manageable with the right approach. Look for stencils with built-in registration marks (little cutouts that help you line up the next placement). A good level tool is absolutely worth the investment—crooked patterns are much more noticeable than slight imperfections in the stenciling itself.
I always recommend working from top to bottom and left to right (if you’re right-handed), overlapping your previous section slightly. Light pencil guidelines on your wall can be a lifesaver, especially for large projects. And here’s a pro tip: take photos as you go! Stepping back and looking at a photo often reveals alignment issues that aren’t obvious when you’re up close.
One expert source suggests, “Use the clip-on stencil level sold separately for easy, accurate alignment.” Tools like this can make a dramatic difference in achieving those crisp, professional results.
How do I choose colors for my stencil project?
Color selection can truly make or break your stencil project. The good news? There’s no wrong answer as long as you love it! However, I do have some guidelines that might help.
First, consider your existing décor. Look at your furniture, artwork (perhaps one of our Hungry Manatee or Lost Cat pieces?), and accessories for color inspiration. Always test your chosen colors on sample boards before committing to an entire wall—colors can look dramatically different once applied.
Bold or subtle? High contrast (like navy on white) creates dramatic statements, while low contrast (like cream on beige) creates subtle texture that adds depth without dominating the room. Both approaches can be beautiful—it just depends on the mood you’re trying to create.
For multi-color stenciling, either stay within the same color family for a harmonious look or choose complementary colors for something more dynamic. And always consider your lighting—colors appear different under natural versus artificial light.
At Handshucked Designs, we often recommend pulling colors from existing artwork to create a cohesive look. Our vibrant art pieces can inspire exciting color combinations that tie your whole room together while reflecting your personal style.
Conclusion
There’s something magical about changing a space with your own hands. Stencil art home decor captures this magic perfectly, offering that rare combination of accessibility, affordability, and boundless creative expression that’s hard to find in other decorating methods.
As we’ve explored throughout this guide, stenciling has made a remarkable comeback in modern interior design. This resurgence isn’t just about aesthetics—it speaks to our deeper desire to surround ourselves with handcrafted elements in a world where mass-production has become the norm. Even when using a pre-made stencil, the process of applying it yourself creates a personal connection to your space that simply can’t be replicated by store-bought décor.
What makes stenciling particularly special is its forgiving nature. You don’t need to be an artist to create something beautiful. A simple weekend project can completely transform a room, breathing new life into tired spaces without breaking the bank. The same stencil can create dramatically different effects across multiple rooms, simply by changing your color palette or application technique.
At Handshucked Designs, we’ve seen how stencil art home decor complements original artwork beautifully. Our whimsical “Lost Cat” series—featuring Buddha Cat, Lucky Cat, and Lemonade—pops against stenciled backgrounds that add depth and texture to the walls. Similarly, our vibrant “Hungry Manatee” designs take on new life when paired with subtle geometric patterns that don’t compete for attention.
We encourage you to start small if you’re new to stenciling. Perhaps a simple border in your bathroom or a modest accent behind a bookshelf. As your confidence grows, so can your projects. The beauty of stenciling lies in its flexibility—you can always paint over and start fresh if something doesn’t turn out as planned. Often, these “mistakes” lead to unexpected creative findies that become your favorite features.
Whether you’re a first-time DIYer or an experienced decorator, we invite you to visit our galleries in Key West, Stock Island, or Bahama Village to see how our distinctive art pieces can complement your stenciling projects. Together, we can create spaces that tell your unique story—one stencil and one art piece at a time.
Your perfect pattern is waiting, and so is the perfect piece of original art to accompany it. Visit our art collection to find inspiration for your next project, and remember—the most beautiful spaces are the ones that reflect the people who live in them.