Spray and Slay with These Top Spray Paint Stencils
Release Your Creative Potential with Spray Paint Stencils
Spray paint stencils are templates with cut-out designs that allow you to transfer patterns onto surfaces using spray paint. They’re the secret weapon behind professional-looking street art, custom home décor, and personalized apparel.
Spray paint stencils transform ordinary surfaces into extraordinary works of art with minimal artistic skill required. The technique bridges the gap between freehand painting and precision artwork, making it accessible to creators at all levels.
What You Need to Know About Spray Paint Stencils:
Materials: The best stencil materials include Mylar (4-14 mil thickness), vinyl with adhesive backing, LLDPE for outdoor use, frisket film for detailed work, and cardstock for one-time projects.
Application: Secure your stencil flat against the surface using tape, weights, or temporary adhesive spray to prevent bleeding.
Technique: Apply paint in light, even coats from about 18” away, maintaining a 90° angle to the surface.
Safety: Always use proper ventilation, wear a respirator, and protect surrounding areas from overspray.
Storage: Clean stencils immediately after use with soap and warm water, then hang to dry before storing flat.
I’m Chris Higgins, and as a trained graphic artist who has spent years developing my style through spray paint stencils and other mediums, I’ve finded that the right stencil can turn even the simplest concept into a striking visual statement.
Ever wonder how street artists create those perfectly crisp images on walls? The secret is spray paint stencils. These magical templates are essentially negative space cut-outs that work like a painter’s mask—allowing color to reach only the areas you want painted while protecting everything else.
What are spray paint stencils?
Think of a stencil as your artistic shortcut. When you press it against a surface and spray over it, paint passes through the cut-out areas while the solid parts block the spray. The result? Clean, defined images that look professionally crafted, even if you’re just starting out.
What I love most about spray paint stencils is their incredible versatility. You can use them on practically anything—concrete walls, canvas totes, wooden signs, metal mailboxes, or that plain t-shirt begging for some personality. Here at Handshucked, we’ve stenciled everything from tiny earrings to entire building murals in Bahama Village.
The best part? These reusable plates keep giving. A well-crafted stencil made from quality material can be used dozens, sometimes hundreds of times. This makes them not just a creative tool, but a smart investment for your artistic toolkit and gentler on both your wallet and the environment.
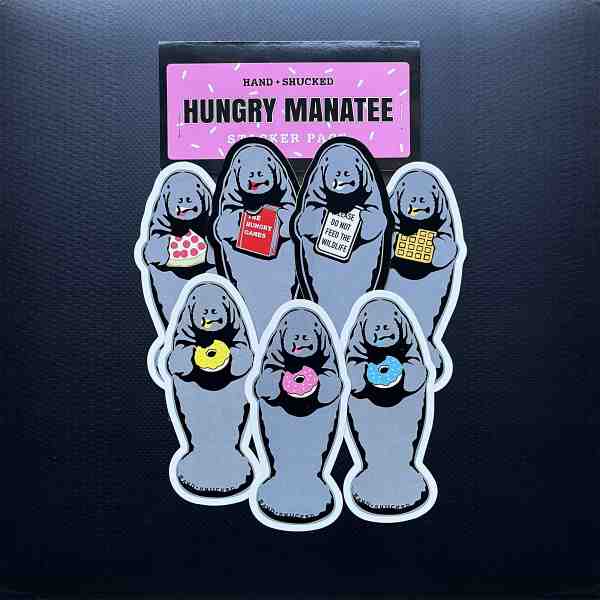
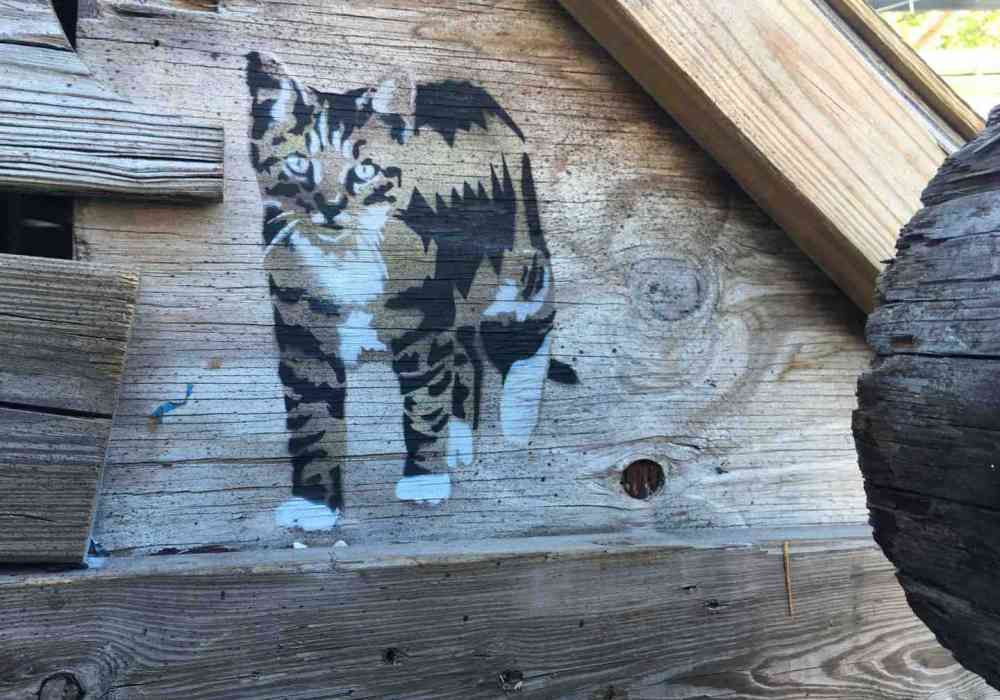
We’re not just stencil sellers—we’re stencil obsessives. At Handshucked Art and Designs, our Key West studio buzzes with stencil projects daily as we create our signature “Lost Cat” and “Hungry Manatee” series that you’ll spot throughout the Florida Keys.
Why trust this roundup?
Every recommendation here comes from hands-on experience. We’ve tested these materials through scorching summers and humid rainy seasons, on projects ranging from intricate details on our hand-printed apparel to large-scale murals that brighten up corners of Stock Island.
But we don’t just rely on our own experiences. Our community of artists and DIY enthusiasts who’ve purchased our stencils provide constant feedback about what works in their hands. The products in this roundup have consistently performed well across different skill levels, from first-timers to veteran artists.
When I suggest a stencil material, it’s because I’ve personally seen it succeed in the unpredictable conditions of outdoor art and the precise demands of detailed work—often with a curious pelican watching over my shoulder (occupational hazard of creating in Key West).
Let’s talk stencils, my friends. After countless hours in our Key West studio creating everything from tiny detailed manatees to massive wall murals, I’ve learned that picking the right stencil material can make or break your project. It’s like choosing the right brush for painting - using the wrong one makes everything harder than it needs to be!
Top 5 Spray Paint Stencils That Deserve a Spot in Your Kit
Before we dive into my favorite picks, here’s a quick comparison of the two stencil heavyweights that most artists debate between:
I’ve spent years testing different materials across hundreds of projects, and these five spray paint stencils have earned permanent spots in our studio toolkit. Each recommendation comes from real-world experience, not just theory, and I’ve matched each one to specific project types and skill levels.
| Feature | Mylar | Vinyl |
|---|---|---|
| Thickness | 4-14 mil | 2-6 mil |
| Flexibility | Moderate | High |
| Adhesion | None (needs taping) | Self-adhesive |
| Reusability | 50+ uses | 10-20 uses |
| Best for | Flat surfaces | Curved surfaces |
| Detail capacity | Excellent | Very good |
| Cleaning ease | Simple soap & water | Requires gentle handling |
| Cost | $$$ | $$ |
Whether you’re decorating your first skateboard deck or tackling a commissioned mural, the right stencil material makes all the difference between professional results and frustrating bleed-through. Trust me, I learned this the hard way back when we started our “Lost Cat” series – the wrong material choice had me redoing an entire batch of shirts!
From durable Mylar that’ll last through dozens of projects to budget-friendly cardstock for one-off creations, these five options cover virtually every spray paint stencil scenario you’ll encounter. Each has its sweet spot where it outperforms everything else, and I’ll walk you through exactly when and how to use each one.
There’s something magical about the clean lines of a well-cut Mylar stencil. Our 10-mil letter and number set has become my go-to recommendation for artists who want precision they can count on time after time. I’ve watched beginners and pros alike fall in love with how these sheets hold their shape through dozens of projects.
Mylar Marvel 10-Mil Letter & Number Set
What makes these spray paint stencils stand out is their incredible edge definition. Each character is laser-cut with surgical precision, giving you text that looks professionally painted every single time. The material has just enough flexibility to work with slightly uneven surfaces, but enough structure to stay put when properly secured.
I still remember when Maria, a local Key West artist who frequents our shop, showed me her two-year-old Mylar set. “These babies have survived everything I’ve thrown at them,” she told me, “and they still cut clean lines like they did on day one.”
At 10-mil thickness, these stencils hit that sweet spot we’re always looking for—durable enough to prevent frustrating paint bleed but flexible enough that you won’t be fighting with them to lay flat. For smooth surfaces like canvas or sign boards, I honestly don’t think you’ll find anything better.
After countless hours in our studio, we’ve developed some tricks that’ll take your stencil game to the next level:
Pro tips for flawless spray paint stencils on Mylar
Start with what we call the “seal coat”—a super light mist of your background color sprayed through the stencil before your main color. This creates a tiny barrier that keeps your edges razor-sharp when you apply the main coat.
For securing your stencils, try the tape-and-magnet combo. Painter’s tape around the edges keeps things anchored, while small rare-earth magnets (the kind you might stick on your fridge) work wonders for keeping larger center areas from lifting.
Always, always clean your stencils right away. Paint that dries on Mylar is like trying to remove gum from hair—technically possible but not fun for anyone involved. A quick wipe with a damp cloth followed by gentle soap and water will keep your stencils ready for their next trip.
We use these exact stencils for many of the layered pieces in our art print collection. By stacking multiple stencil layers with different colors, we create depth that makes the art pop in a way that single-layer work just can’t match. You can see some of my favorite examples in our art prints collection.
When your canvas isn’t flat—like a guitar body, helmet, or curved furniture piece—our Adhesive Vinyl Pro Pack becomes your new best friend. These clever stencils feature a low-tack backing that gently hugs your surface without leaving that annoying sticky residue when you peel them away.
Adhesive Vinyl Pro Pack for Curved Surfaces
The real magic of these vinyl stencils is how they lovingly conform to curved surfaces while maintaining a tight seal against whatever you’re painting. This prevents that heart-breaking moment when paint bleeds under your stencil and ruins hours of careful setup.
“For my custom skateboard designs, nothing beats vinyl stencils,” shares Tony Rodriguez, a Stock Island artist who frequently collaborates with us at Handshucked. “They hug the concave deck perfectly and peel off cleanly after spraying.”
What makes our vinyl stencils special isn’t just their flexibility—it’s their forgiving nature. Made a mistake with placement? No problem! The repositionable adhesive lets you carefully lift the stencil and try again without damaging either the stencil or your precious project surface. This feature is worth its weight in gold, especially when you’re just starting out or working on something you really can’t afford to mess up.
Creating crisp, clean edges with spray paint stencils is where art meets technique. Here’s how we do it at Handshucked:
Spray paint stencils without bleed—here’s how
First, accept the fine-mist approach. Hold your spray can about 18 inches away from your surface and be patient—apply several whisper-light coats rather than one heavy one. This prevents paint from pooling at the edges, which is usually what causes bleeding.
Second, try our favorite pro trick: before adding color, spray a light coat of clear acrylic medium through your stencil. This creates a sealed barrier along the edges that works wonders for keeping lines sharp.
Finally, don’t skip the burnishing step! After positioning your vinyl stencil, grab a plastic card (an old gift card works perfectly) and firmly press down all edges, giving extra attention to those intricate details where paint loves to sneak under.
According to the passionate stencil enthusiasts over at DIYStompboxes forum, these techniques can dramatically improve your results, turning “that looks homemade” into “wow, where did you buy that?” And that’s exactly what we’re aiming for at Handshucked—helping you create pieces that look professionally crafted.
Curious about the science behind why these techniques work so well? Dive deeper with this fascinating scientific research on paint adhesion.
When you’re taking your art to the great outdoors or need something that can withstand serious abuse, our Heavy-Duty LLDPE stencils are your new best friend. At a whopping 125 mil thickness, these bad boys are practically bulletproof – perfect for projects where durability isn’t just nice to have, it’s absolutely essential.
Heavy-Duty LLDPE Field Stencil (Parking & Outdoor)
These are the heavyweight champions of the spray paint stencil world. They’re what we use for those massive projects around Key West – parking lot markings, giant logos, and outdoor signage that needs to withstand Florida’s punishing sun and sudden downpours. The thick material shrugs off tearing, refuses to warp, and laughs in the face of harsh cleaning chemicals.
Coach Williams from our local sports complex told me, “We’ve beaten the heck out of the same set of LLDPE stencils for three full seasons now. They’ve been walked on, rained on, and stored rolled up in a closet for months – but they still give us crisp lines every single time we bring them out.” That’s exactly the kind of resilience we designed them for.
What makes our LLDPE stencils special is their clever edge design. We’ve engineered them to minimize underspray even on rough surfaces like asphalt or textured concrete. Plus, the material’s natural weight helps it stay put during application – a huge advantage when you’re working on a windy Key West afternoon.
Going big with stencils brings its own set of challenges. Here’s how we handle large-scale projects at Handshucked:
Scaling up your spray paint stencils
For truly massive designs (we’re talking bigger than 6 feet), we build in subtle registration marks that let you perfectly align multiple panels. This clever system means there’s virtually no limit to how big you can go – we’ve helped create murals spanning entire building sides using this technique.
When the breeze picks up (as it often does here in the Keys), forget struggling with endless tape. Instead, grab a few sandbags or purpose-made weight bags and place them strategically around your stencil’s edges. They provide better stability and won’t pull up your stencil when you need to reposition.
Before you even lay down your stencil, take a minute to mark a few alignment points with chalk. These temporary guides ensure perfect positioning, especially for multi-part designs, and they brush away easily when you’re done. This simple step has saved us countless headaches on big projects around town.
According to industry experts, custom stencils can range from tiny 1/16th inch lettering to massive 6-by-10-foot single pieces, and with our multi-panel approach, we’ve created designs stretching up to 30 feet. Our LLDPE stencils accept this scalability while adding the kind of toughness that stands up to real-world use year after year.
When you’re ready to take your stencil game to the micro level, our Frisket Film Detail Kit becomes your new best friend. At a whisper-thin 2.5 mil thickness, this specialized film lets you create the kind of intricate designs that would make other stencil materials throw in the towel.
Frisket Film Detail Kit for Airbrush & Miniatures
What makes this film truly magical is its gentle self-adhesive backing that forms an air-tight seal on smooth surfaces. This means zero paint bleed while still allowing you to cut and remove incredibly delicate details – we’re talking hairline precision that’ll make your friends wonder if you’ve developed superpowers.
“I swear by frisket film for all my custom model cars,” Deon Taylor told me when I visited his studio in Bahama Village last month. “The level of detail is best – I can create pinstripes less than 1mm wide with edges so clean they look machine-made.”
One of my favorite features is the transparency of the film itself. You can place it directly over your reference image, trace the design with confidence, and see exactly where your cuts should go. This transparency is a game-changer when you’re trying to transform photographs or complex designs into spray paint stencils for your miniatures or fine art projects.
Creating multi-layered, multi-colored masterpieces requires a bit of planning, but the results are worth every minute. Here’s how we approach complex layering at the Handshucked studio:
Layering multi-color spray paint stencils
First, always create small registration marks on all your stencil plates. These little alignment guides should correspond with marks on your surface or base layer – they’re your insurance policy against misaligned layers that can ruin hours of work.
Working from light to dark colors is generally the smartest approach. Start with those pale yellows and work your way to the deeper blues and blacks. This progression makes it much easier to cover any minor overspray or mistakes along the way.
Patience is key between layers. I know it’s tempting to rush, but allowing each color layer to fully dry before applying the next stencil will save you countless headaches. For most spray paints, that means waiting at least 90 seconds, but I recommend a full 10 minutes between layers if you can stand the wait.
Don’t forget that colors interact when layered – spray yellow over blue and suddenly you’ve got green! Plan your color sequence with these interactions in mind, especially for complex pieces like our multi-layered street art murals around Key West.
For inspiration that might spark your next multi-layered creation, take a peek at our street art collection. Some of these pieces use up to seven carefully registered layers to create depth and dimension that simply can’t be achieved with single-layer work.
Not every creative endeavor calls for an investment-grade stencil. When you’re tackling a one-time project, experimenting with a new design, or introducing kids to the joy of stenciling, our 300 GSM Cardstock Budget Basics are your perfect companion.
Cardstock Budget Basics (One-Off Projects)
These affordable stencils strike the sweet spot between quality and economy. The 300 GSM (grams per square meter) weight gives you enough substance to prevent the dreaded paint-warp while still being easy enough to cut with standard craft knives or scissors. They’re ideal for those “lightning bolt of inspiration” moments when you want to test an idea without committing to expensive materials.
“For my daughter’s birthday party, we used cardstock stencils to customize party favor bags,” shares Jamie Lewis, a Key West local who frequents our shop. “The kids were absolutely mesmerized watching their names appear ‘like magic,’ and I didn’t have to break the bank on materials for what was essentially a one-afternoon project.”
What sets our cardstock options apart from regular paper is the special coating we apply that resists paint absorption. This gives you surprisingly clean edges and allows for several uses before you might need a replacement – though they’re affordable enough that you won’t feel guilty about recycling them after a single project.
At Handshucked, we take our environmental responsibility seriously, which is why we’ve developed approaches that let you create beautiful art with minimal ecological impact.
Making eco-friendly spray paint stencils
Our budget stencils are crafted from 100% post-consumer recycled cardboard that can go straight into your compost bin after you’ve finished your masterpiece. We also encourage thoughtful cutting – planning your design so both the positive and negative spaces become useful stencils essentially gives you two templates for the price of one!
When using these spray paint stencils, try applying paint in controlled, light coats. Not only does this technique create cleaner lines, but it also reduces waste and minimizes the VOCs (volatile organic compounds) released into our beautiful Key West air. When possible, reach for water-based spray paints, which have a significantly lower environmental footprint than traditional solvent-based alternatives.
If you’re looking to dive deeper into sustainable stencil creation, this excellent research on DIY methods offers fantastic guidance for developing complex designs with minimal environmental impact.
According to wikiHow’s popular spray paint stencil article (viewed over 939,000 times), 300 GSM art paper is the ideal weight for stencil creation. If you can’t find exactly 300 GSM, anything above 250 GSM will work nicely – confirming exactly what we’ve found in our years of stencil-making at the studio.
Whether you’re decorating a nursery wall, creating custom t-shirts for a family reunion, or just wanting to try your hand at stencil art without a big investment, these cardstock basics deliver impressive results while keeping both your wallet and the environment happy.
The right spray paint stencil can transform your creative vision into reality, whether you’re working on a small craft project or a large-scale mural. We’ve spent countless hours at Handshucked Art and Designs perfecting our stencil techniques across our Key West studios. These methods have become the backbone of our signature series like the whimsical “Lost Cat” and beloved “Hungry Manatee” collections that locals and visitors have come to recognize throughout the Florida Keys.
Conclusion
After all our experimentation and field testing, we’ve found that the material choice makes all the difference. Mylar stencils deliver that crisp precision when you need multiple uses, while vinyl conforms beautifully to guitars, helmets, and other curved treasures. For those parking lot projects or outdoor installations that face the full force of Florida’s weather, nothing beats the durability of LLDPE. When you’re working on intricate details that require a steady hand, frisket film becomes your best friend, and for those spontaneous creative moments, cardstock provides an eco-friendly, budget-conscious option.
Preparation is everything in the stencil world. Take the time to clean your surface thoroughly—trust us, those tiny dust particles can ruin an otherwise perfect piece. Secure your stencil flat against your canvas (tape, weights, or spray adhesive all work wonders), and consider applying that light sealing coat we mentioned to keep your edges razor-sharp.
When it comes to application, patience truly pays off. Light, even coats from about 18 inches away will give you much better results than heavy-handed spraying. Give each layer the time it deserves to dry before adding the next—your future self will thank you for not rushing this step.
Remember to show your stencils some love after each use. A quick wash with soap and warm water right after you finish will extend their lifespan dramatically. We hang ours to dry completely before storing them flat—it makes all the difference in preventing warping and ensuring they’re ready for your next burst of creativity.
Safety isn’t just a suggestion when working with spray paint. Always choose a well-ventilated area (we often work outdoors in our Key West courtyard), wear appropriate respiratory protection, and keep those colorful cans away from heat sources and curious little hands.
If you’ve got a vision that requires something completely custom, we’d love to help bring it to life. Our design team creates bespoke stencils for everything from business logos to wedding decorations—just reach out and let’s talk about your project.
Curious to see how we incorporate these techniques into our own artwork? Take a peek at our art section or swing by one of our locations to see how spray paint stencils have shaped our artistic identity throughout Key West, Stock Island, and Bahama Village.
What we love most about stencil art is that it truly is for everyone. You don’t need years of art school or natural-born talent to create something remarkable—just the right tools, a bit of guidance, and the courage to make that first spray. We hope this guide inspires you to grab a stencil, shake up a can of paint, and start creating. Your blank wall, t-shirt, or skateboard deck is waiting to become something amazing.