Stencil Your Mark: DIY Street Art Guide
The Art of Leaving Your Mark: An Introduction to Stencil Street Art
How to make stencil street art is a skill that combines artistic vision with precise craftsmanship, allowing you to create bold, repeatable designs on urban surfaces. If you’re looking to create your first stencil street art piece, here’s a quick guide:
Stencil art has deep historical roots, dating back 30,000 years to prehistoric cave handprints. The modern street art movement acceptd stencils in the 1960s protest era, with pioneers like Ernest Pignon-Ernest and Blek le Rat establishing techniques that later influenced artists like Banksy.
- Choose a high-contrast image or create a simple design
- Transfer design to cardstock, acetate, or mylar (thickness: 3-7 mil)
- Cut out black/negative areas with a sharp X-Acto knife, creating “bridges” to support islands
- Secure stencil to surface with tape or repositionable adhesive
- Spray paint in thin, even layers from 6-9 inches away
- Remove stencil carefully after brief drying time
I’m Chris Higgins, founder of Handshucked Designs, and after years as a commercial designer, I’ve developed a passion for teaching others how to make stencil street art that combines bold illustration with elements of graffiti and pop art. My journey began in a breadtruck-turned-studio, where simplicity and precision became my guiding principles for creating impactful stencil work.
What Is Stencil Street Art? Origins & Evolution
Have you ever wondered where stencil art began? The story starts with our ancestors pressing their hands against cave walls and blowing pigment around them. These negative-space hand stencils have survived for thousands of years—a testament to humanity’s enduring creative spirit and perhaps our first lesson in how to make stencil street art.
This simple technique traveled through time, serving practical purposes in government, military, and industrial settings before changing into something more profound. When the political and social landscape shifted dramatically in the 1960s, stencil art found its voice in protest.
“Spray-painted stencils were first used in protest art as early as the 1960s,” explains street art historian Jeffrey Deitch. “They provided a quick, reproducible way to spread messages of dissent.”
The 1970s marked a turning point when French artist Ernest Pignon-Ernest began placing life-sized stenciled figures in urban environments. His haunting, contextual pieces spoke volumes about social issues without saying a word. Meanwhile, across the ocean, American artist John Fekner was making his mark with conceptual text-based works. His famous “Broken Promises” phrase appeared on crumbling New York infrastructure, highlighting urban decay and governmental neglect.
Enter the 1980s and the streets of Paris welcomed a new kind of artist—Blek le Rat (Xavier Prou). Often called the “Father of stencil graffiti,” Blek transformed urban spaces with his iconic rat stencils. “The rat is the only free animal in the city,” he once said, capturing his philosophy about urban art and freedom of expression perfectly.
These visionaries paved the way for the explosion of stencil street art in the late 1990s and 2000s. Perhaps no one embodies this evolution better than Banksy, whose politically charged, ironic stencil works have transcended the streets to become global cultural touchstones. What began as underground expression has blossomed into a recognized art form that continues to challenge conventions and transform urban landscapes worldwide.
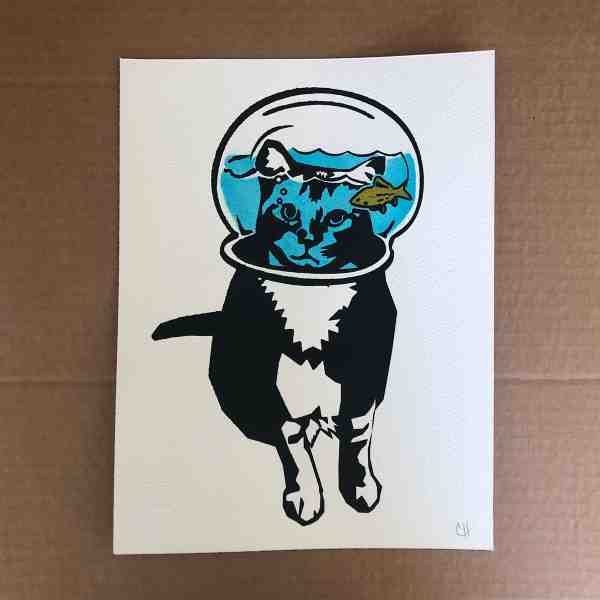
At Handshucked Designs, we’re inspired by this rich mix of street art. Our “Lost Cat” and “WTFishbowl” series blend whimsy with social commentary, carrying forward the tradition of these street art pioneers while adding our own colorful perspective to the global conversation.
The beauty of stencil art lies in its accessibility and power—with just a few tools and techniques, anyone can learn how to make stencil street art that speaks volumes. Whether you’re inspired by cave paintings or Banksy’s latest piece, you’re part of an artistic tradition that spans human history.
Ready to jump into stencil art? Let’s talk about what you’ll need in your creative toolkit! Getting the right supplies is like having good ingredients for a recipe – they make all the difference in your final creation.
Essential Gear: Tools & Materials Checklist
When I first started making stencils at Handshucked Designs, I learned quickly that quality materials save headaches down the road. Our “Lost Cat” series wouldn’t have those crisp lines without the right tools!
Let’s talk stencil materials first. Each has its own personality:
For cutting, you’ll become best friends with your X-Acto knife and fresh #11 blades. Trust me on this – don’t try to stretch the life of a dull blade! Plan on using 3-5 blades per stencil. A self-healing cutting mat isn’t just nice to have; it’s essential for protecting your work surface and keeping your blades sharper longer. Keep some small scissors handy too for quick adjustments.
Essential Materials for Stencil Creation:
| Material | Durability | Ease of Cutting | Reusability | Best For |
|---|---|---|---|---|
| Cardstock (110lb) | Low-Medium | Easy | 3-5 uses | Beginners, simple designs |
| Acetate | Medium-High | Medium | 10-15 uses | Detail work, smooth surfaces |
| Mylar (3-7 mil) | High | Challenging | 20+ uses | Professional work, complex designs |
| Frisket Film | Low | Very Easy | 1-3 uses | Curved surfaces, automotive work |
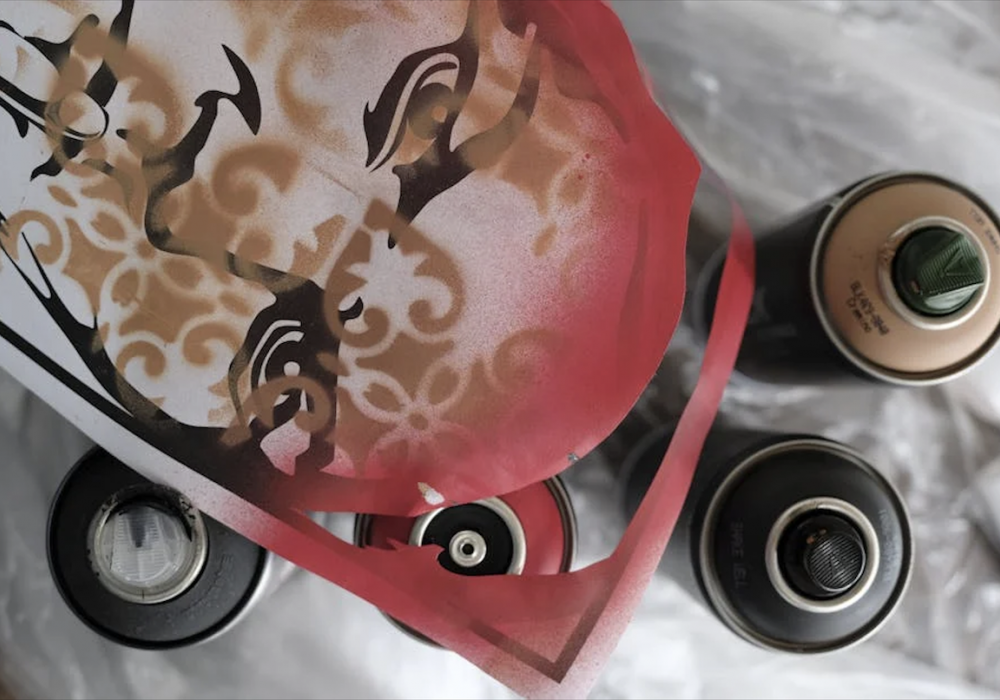
When it comes to painting, quality spray paint makes a world of difference. The cheap stuff might save you a few bucks, but art-grade paints give you better coverage and control. Grab some different spray caps to create various line widths and effects. Low-tack painter’s tape or spray adhesive will hold your stencil in place without damaging surfaces.
Street artist TMNK once told me, “I’ve been working with stencils for many years, and I’ve learned that investing in quality materials upfront saves frustration later. A sharp blade and proper stencil material can make the difference between a clean, professional piece and a blurry mess.”
Safety isn’t optional when you’re working with how to make stencil street art. Always use a proper respirator with replaceable filters – not just a bandana or dust mask. Your lungs will thank you! Nitrile gloves protect your hands from paint and chemicals, while safety glasses shield your eyes. And always work in a well-ventilated space.
At Handshucked, we’ve fallen in love with 5 mil mylar for our detailed work, especially for the intricate elements in our “Hungry Manatee” series. If you’re just starting out, I recommend beginning with cardstock to get comfortable with cutting techniques before investing in pricier materials.
The tools don’t make the artist – but they sure can help you express your vision more clearly. Start with the basics and add to your collection as your skills grow!
Now that you understand the history and have gathered your materials, let’s dive into the actual process of how to make stencil street art. This step-by-step guide will take you from concept to completed stencil.
The foundation of any great stencil begins with selecting the right image. Not every picture will translate well to a stencil format.
How to Make Stencil Street Art Designs (Step-by-Step)
Choose & Simplify Your Image
When hunting for that perfect stencil-worthy image, look for high contrast between light and dark areas – this creates the visual impact that makes stencil art pop. The best stencil designs feature clear, recognizable shapes with limited fine details (especially important if you’re just starting out). Strong silhouettes work wonderfully in this medium.
“The simplest line that communicates the image is the best,” advises stencil artist C215. “Stencil art is about reduction—finding the essential elements that tell the story.”
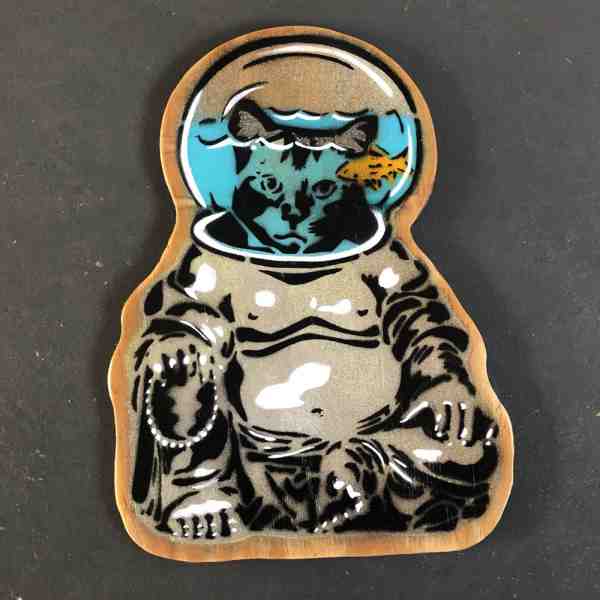
For your first attempts, I’d recommend starting with logos, simple portraits, or bold graphic designs. At Handshucked Designs, our “Buddha Cat” stencil began as a photograph that we simplified to its essential elements, creating an iconic image that works beautifully in stencil form.
Remember to use copyright-free images or create your own designs. Public domain resources like Pixabay or Unsplash offer excellent starting points for legal image sourcing.
Digitally Prep: Contrast, Threshold & Layers
Digital preparation transforms your chosen image into a stencil-ready template. This crucial step determines how cleanly your stencil will cut and spray.
First, open your image in an editing program – Photoshop and GIMP are professional options, but even free online editors can work in a pinch. Convert your image to grayscale, then crank up the contrast to 100%. This creates stark differences between light and dark areas. Next, adjust the brightness until you see clearly defined areas that will become your stencil’s cut-out sections.
The magic happens when you apply a threshold adjustment. This converts your image to pure black and white pixels, eliminating any gray areas that would make cutting difficult. While you’re examining your black-and-white design, identify any “islands” – isolated sections that would fall out when cut – and plan connecting bridges to keep them in place.
For multi-color stencils, you’ll need to separate your design into different layers—one for each color. Each layer becomes a separate stencil that you’ll apply sequentially.
“Manual brightness and contrast adjustments give you more control than automatic filters,” notes street artist Above. “Take your time with this step—it’s where you really define what your stencil will look like.”
Not comfortable with photo editing software? Services like Bay Stencil can automatically generate stencil-ready templates with bridges already included.
Once your digital template is ready, it’s time to transfer it to your chosen stencil material.
Print & Transfer to Stencil Material
Print your design at actual size, making sure to include at least a 2-inch border around all edges – this extra material provides crucial stability when you’re painting. Use small pieces of tape at the corners to attach your printed template to your stencil material.
Depending on your materials, you have several transfer options. For transparent materials like acetate, you can simply trace with a permanent marker. Working with opaque materials? Try the graphite transfer method by covering the back of your printed design with pencil graphite, placing it on your stencil material, and tracing the lines with a ballpoint pen. Carbon paper placed between your template and stencil material also creates clean transfers.
“I always include registration marks—small crosses or dots in the corners—when transferring multi-layer designs,” says Handshucked Designs artist Milo Jenkins. “These help align multiple stencils perfectly during application.”
For our “Lucky Cat” series at Handshucked, we often hide alignment guides within the design itself—for example, using distinctive whisker patterns that help us register multiple color layers precisely.
How to Make Stencil Street Art: Cutting Techniques
Cutting is perhaps the most critical and challenging aspect of how to make stencil street art. Precision here directly impacts your final result.
Always start with fresh blades – I can’t emphasize this enough. Replace your X-Acto blade frequently, as dull blades tear the material and create jagged edges. Most artists use 3-5 blades per stencil plate. Begin cutting the smallest, most intricate sections first while your stencil material is still intact and rigid, giving you more control over delicate areas.
Hold the knife like a pencil at a 45° angle, and pull the blade toward you in short, controlled strokes. Never force the blade – let the sharpness do the work. Always cut on a self-healing mat to protect your work surface and prevent blade dulling.
As you cut, maintain thin connections (bridges) to support “islands” in your design. These should be about 1/8” to 1/4” wide and placed strategically along natural lines in the image. For example, when creating a face, bridges can follow natural contours like hairlines or jawlines.
“Some artists describe cutting tiny holes in paper as more relaxing than meditation,” notes stencil artist cutanddestroy. “Take your time and enjoy the process—rushing leads to mistakes.”
For especially delicate areas, I’ve found that reinforcing bridges with thin florist wire taped across fragile “peninsulas” prevents tearing during use – a little trick we developed at Handshucked when working on our intricate fish designs.
After cutting comes the exciting moment—applying paint through your stencil. Proper technique here ensures clean, crisp lines without the dreaded “underspray” that can blur your design.
How to Make Stencil Street Art: Preventing Bleed & Painting
The first step to successful stencil painting is securing your stencil firmly against the surface. Use low-tack tape, a light spray adhesive, or weights (stacks of pennies work great) to hold the stencil flat. Any gap between stencil and surface invites paint to seep underneath, ruining your clean edges.
Control your spray distance by holding the can 6-9 inches from the surface at a 90° angle. Too close causes drips; too far creates fuzzy edges. Apply paint in short, even bursts using a sweeping motion – start spraying off the stencil, move across it, and release the nozzle after clearing the edge.
Always build up color through multiple light coats rather than one heavy application. Allow 30-90 seconds between passes. This patience pays off with cleaner results and prevents paint pooling under your stencil.
“I’ve found that holding the spray can at exactly 90 degrees to the surface is crucial for clean edges,” shares Handshucked Designs founder Chris Higgins. “When we created our ‘Lemonade’ stencil series in Key West, maintaining that consistent angle and distance made all the difference in preserving the fine details.”
Before committing to your final surface, test your spray technique on scrap material. This practice run helps you get a feel for the paint flow and pressure needed for your specific stencil design.
Ready to take your stencil art to the next level? Check out More info about Street Art for inspiration and advanced techniques from our Handshucked artists.
Multi-Layer Magic & Color Registration
Ready to lift your stencil game? Let’s explore the colorful world of multi-layer stencils – where your street art truly comes alive with depth and dimension.
Multi-layer stenciling is like orchestrating a visual symphony. Each color plays its part, coming together to create something more powerful than any single element could achieve alone. I’ve found that mastering this technique opens up endless creative possibilities.
Separating your design by color is your first step in this journey. Think of each color as needing its own dedicated stencil plate. At Handshucked Designs, we typically work from darkest to lightest colors – this approach gives us the most control over the final look. When creating our “Vintage Toys” series, we used four distinct layers, starting with deep blacks and building up to bright yellows and whites that really pop against the darker foundation.
Alignment is everything in multi-layer work. Trust me, there’s nothing more frustrating than a perfectly cut stencil that’s applied just slightly off-center! That’s why we always include registration marks – small crosses or alignment dots in the corners of each stencil layer. These humble guides are the unsung heroes of clean multi-layer work.
“I once spent three hours cutting an intricate four-layer portrait only to ruin it with misalignment on the final layer,” shares street artist ABOVE. “Now I triple-check my registration marks before every spray.”
Organization saves sanity when juggling multiple stencil plates. I recommend clearly labeling each layer with numbers or color codes. At Handshucked, we write directly on the edge of each stencil – “Layer 1: Black outline,” “Layer 2: Red fill,” and so on. This simple system has saved us countless headaches during application.
When it comes to actually spraying multi-layer pieces, patience becomes your superpower. Allow proper drying time between layers – at least 90 seconds outdoors or 10 minutes indoors. I’ve learned this lesson the hard way! During our “Lucky Cat” series creation, rushing between layers left us with smudged whiskers and blurry eyes that required starting over.
The beauty of multi-layer work is in the thoughtful overlap between colors. Design your layers with slight overlap to prevent unsightly gaps. This creates a seamless transition between colors, giving your work that professional finish that distinguishes great stencil art from amateur attempts.
At Handshucked Designs, our “Lost Cat” series showcases the magic of perfect layer registration. The subtle interplay between the cat silhouette, text elements, and background textures creates a dimensional quality that simply wouldn’t be possible with a single stencil.
Multi-layer stenciling is a skill that improves with practice. Don’t be discouraged if your first attempts aren’t perfect. Each layer you spray teaches you something valuable about technique, timing, and precision in how to make stencil street art that truly stands out.
Let’s talk about staying safe and on the right side of the law while creating your street art masterpieces. After all, expressing yourself shouldn’t come at the cost of your health or legal standing!
Safety, Reuse & Legal Street Smarts
Breathe easy, create longer
Spray paint might look harmless coming out of those colorful cans, but the chemicals inside are no joke. Those VOCs (volatile organic compounds) can take a serious toll on your lungs over time.
“I’ve seen too many artists develop chronic respiratory issues from years of inadequate protection,” warns veteran street artist Swoon. “Your lungs are worth more than the few minutes it takes to put on proper safety gear.”
Always wear a proper respirator – and I don’t mean just pulling your t-shirt over your nose! Invest $30-40 in a quality respirator with replaceable filters. Your future self will thank you. Pair this with nitrile gloves to keep paint chemicals off your skin (and make cleanup a breeze), and don’t forget safety glasses to protect those peepers from paint particles.
Ventilation matters tremendously. Whenever possible, work outdoors or in spaces with excellent air flow. That basement studio might seem perfect until you realize you’re essentially breathing paint fumes for hours.
Giving your stencils a long, happy life
After putting all that work into cutting the perfect stencil, you’ll want it to last. Gently wipe excess paint from your stencils with a soft cloth after each use – this prevents buildup that can blur your edges over time.
Store your stencils either perfectly flat between sheets of paper or carefully rolled in tubes. Nothing ruins a stencil faster than bent corners or crinkled centers! If you notice small tears developing, a bit of clear tape on the non-spray side can extend your stencil’s lifespan considerably.
Different materials have different lifespans: those cardstock stencils will typically last 3-5 uses before losing their crisp edges, while properly maintained mylar stencils can survive 20+ applications.
Staying legal while staying creative
The line between art and vandalism often comes down to one simple word: permission. The legal status of street art varies dramatically depending on where you live.
At Handshucked Designs, we follow what some call the “One Leg Out” code of ethics: create art that uplifts communities, seek proper permissions, and be prepared to stand behind your work. In Key West and Stock Island, we’ve built relationships with property owners who welcome our stencil art, creating win-win situations that improve the local aesthetic.
Before spraying, take time to research local laws – many cities now have designated areas for legal street art, while others maintain strict anti-graffiti ordinances with hefty fines. Always get property owner consent before creating street art on private property. Not only does this keep you legal, it often leads to more meaningful connections within your community.
“The best street art adds value to a community,” notes Chris Higgins. “Our ‘Hungry Manatee’ series in Bahama Village celebrates local marine life while bringing color to previously overlooked spaces—with full permission from property owners.”
Choose locations and content that improve rather than detract from community spaces, and always respect other artists by never painting over existing work without permission. How to make stencil street art responsibly means considering the impact of your work on the people who’ll see it every day.
When you approach street art with both creativity and conscience, you’ll find your work becomes something that brings people together rather than causing controversy – and that’s when the real magic happens.
When you’re creating stencil art that needs to brave the elements, choosing the right materials makes all the difference between a fleeting statement and lasting impression.
Frequently Asked Questions about How to Make Stencil Street Art
What materials last the longest outdoors?
Mylar in the 5-7 mil thickness range is your best friend for durable, reusable outdoor stencils. This sturdy material holds up remarkably well against repeated use and won’t buckle in humid conditions. For the paint itself, look for quality exterior-grade spray paints with UV resistance to prevent fading.
Here in Key West, our Handshucked Designs team battles some pretty intense environmental challenges – relentless sunshine, salt air that corrodes everything it touches, and humidity that seems to have a personal vendetta against art materials. We’ve learned through trial and error that adding a clear UV-resistant coating as a final layer works wonders.
“I’ve watched pieces transform from vibrant to washed-out in just months without proper sealing,” says our lead artist. “A light coat of clear polyurethane can be the difference between your creation lasting one season or becoming a neighborhood landmark for years. Just double-check it’s compatible with your base paint – otherwise, you might find an interesting cracking effect you didn’t plan for!”
Rough surfaces are the nemesis of clean stencil lines, but with a few clever techniques, you can conquer even the most challenging textures.
How do I keep my stencil flush on a rough wall?
Spray adhesive is perhaps your most valuable ally – a light misting of repositionable adhesive on the back of your stencil creates just enough tackiness to help it hug irregular surfaces without becoming permanently stuck. For larger pieces, try working in sections, securing and spraying one area at a time for maximum control.
The material thickness matters too. On highly textured walls, thinner, more flexible stencil materials (like 3 mil mylar or acetate) will conform much better than rigid options. Sometimes adapting your application technique helps – try a gentle dabbing motion with your spray can instead of the usual sweeping spray, which helps push paint into all those nooks and crannies without the dreaded underspray.
“We got pretty creative when working on those rough concrete walls in Stock Island,” Chris from our Handshucked Designs team recalls with a laugh. “We finded that small rare-earth magnets with metal washers on the opposite side of thin surfaces were absolute magic for keeping stencils flush. For thicker concrete walls, we started using small sandbags around the edges – not the most sophisticated solution, but incredibly effective!”
The legal landscape for how to make stencil street art that won’t land you in hot water varies dramatically depending on where you’re creating. Understanding the rules before you spray is just as important as mastering your technique.
Is it legal to spray stencil art in my city?
Most cities have specific graffiti ordinances that you can find on municipal websites. Some places make clear distinctions between commissioned artwork and unauthorized graffiti, while others have designated legal walls or arts districts where expression is encouraged. The smart approach is to research before you create.
Your legal options generally include getting written permission from property owners, applying for permits when they’re available, participating in sanctioned street art events, or simply creating on portable surfaces that you own before displaying them.
“When we started Handshucked Designs, we built our reputation entirely within legal boundaries,” our founder shares. “We began with commissioned pieces on private property in Key West, which eventually blossomed into invitations for more public installations as people recognized our style.”
The consequences for unauthorized work can range from fines to misdemeanor charges, depending on location and circumstances. The most sustainable path – and the one that lets you keep creating for years to come – is approaching street art with respect for both legal boundaries and community standards.
Some of the most impactful street art happens with permission and community support. Our “Lost Cat” series and “Hungry Manatee” works have become beloved local landmarks precisely because they were created with the neighborhood’s blessing.
Conclusion
The journey of learning how to make stencil street art connects us to something truly special – a creative tradition that stretches from prehistoric cave walls to modern urban landscapes. There’s something magical about peeling back a carefully cut stencil to reveal your vision transferred onto a surface, isn’t there?
Throughout this guide, we’ve walked together through each step of the stencil-making process. You’ve learned about selecting the perfect image, preparing it digitally, cutting with precision, and applying paint with techniques that ensure crisp, clean results. You’ve finded how to work safely and responsibly, respecting both your health and the communities where your art might appear.
At Handshucked Designs, stencil art has become our love language to the world. When we create pieces from our “Lost Cat” series on the sun-drenched walls of Key West, we’re not just making pretty pictures – we’re continuing a tradition of creative expression that’s as old as humanity itself.
“I remember the first time I successfully pulled away a three-layer stencil to reveal a perfect print,” shares Chris Higgins. “That feeling – seeing something that existed only in my mind now living on a wall where everyone could experience it – that’s what keeps me coming back to stencil art again and again.”
The beauty of stencil art lies in its accessibility. With just a few simple tools and the techniques we’ve shared, you can transform ordinary spaces into extraordinary moments of connection and surprise. Whether you’re working on canvas in your home studio or (with proper permissions) bringing color to public spaces, you’re now equipped to make your mark.
We hope this guide inspires you to pick up that X-Acto knife and spray can to begin your own stencil art trip. Visit our art originals page for inspiration, or stop by our gallery in Key West to see how we’ve incorporated these techniques into our work. We’d love to see what you create – tag us in your projects and join our community of fellow stencil enthusiasts!
The best street art doesn’t just decorate – it transforms. It turns the mundane into the magical. It makes people stop, smile, and see their surroundings with fresh eyes. Now it’s your turn to create those moments of unexpected joy for others to find.