Stencil Art 101: Cut, Spray, Amaze!
How to create stencil art involves changing a design into a cut template that allows you to apply paint in specific areas, creating crisp, clean images. This technique dates back over 30,000 years to prehistoric cave paintings, yet remains relevant and powerful today.
Quick Guide to Create Stencil Art:
- Choose a design - Select or create a high-contrast image
- Prepare your material - Cut your stencil from vinyl, freezer paper, or mylar
- Cut out the design - Use a sharp X-Acto knife on a cutting mat
- Secure the stencil - Tape down edges to prevent shifting
- Apply paint - Use even strokes with spray paint or dabbing motions with a sponge
- Remove carefully - Lift straight up after paint has set
Stencil art offers a perfect blend of precision and creative freedom. Whether you’re decorating walls, customizing clothing, or creating fine art, stencils provide a technique that’s both accessible to beginners and limitless for experts.
“You leave a part of yourself” - Blek le Rat, pioneer of stencil graffiti
What makes stencil art so appealing is its versatility. The same technique that street artists use to make powerful statements can be adapted to create neat home décor or personalized gifts. The contrast between the methodical planning of cutting a stencil and the spontaneous application of color creates a unique artistic tension that produces striking results.
I’m Chris Higgins, and throughout my career as a graphic artist establishing Handshucked Designs, I’ve incorporated how to create stencil art techniques to develop my signature style that combines bold illustration with elements of graffiti and pop art. For more on the history of stencil art, check out this comprehensive overview from the Tate Museum.
Materials Needed for Stencil Art
Getting your hands on the right materials is the first exciting step in your stencil art journey. Trust me, having quality tools not only makes the process more enjoyable but dramatically improves your results too!
Essential Materials for Creating Stencil Art:
When I first started creating stencil art, I quickly learned that investing in good materials saves frustration later. The right stencil material gives you clean edges, while sharp cutting tools make precision work a breeze.
Let’s look at the different stencil materials you can choose from:
| Material | Best For | Durability | Reusability |
|---|---|---|---|
| Vinyl | Hard surfaces | High | 20+ uses |
| Freezer Paper | Fabric | Medium | 1-3 uses |
| Mylar | Detailed work | High | 10+ uses |
| Cardstock | One-time use | Low | 1 use |
Vinyl Stencil Materials
Vinyl is my go-to for creating lasting stencils. It’s durable, flexible, and perfect for hard surfaces like wood, canvas, or walls.
Laura M. Johnson, a mural artist I greatly admire, once told me: “You should make painting stencils out of Mylar or other plastic if you want to reuse them, as materials that won’t absorb paint. The problem with using paper, cardboard, or even wood is that they are usually one-time use stencils because they will soak up the paint.”
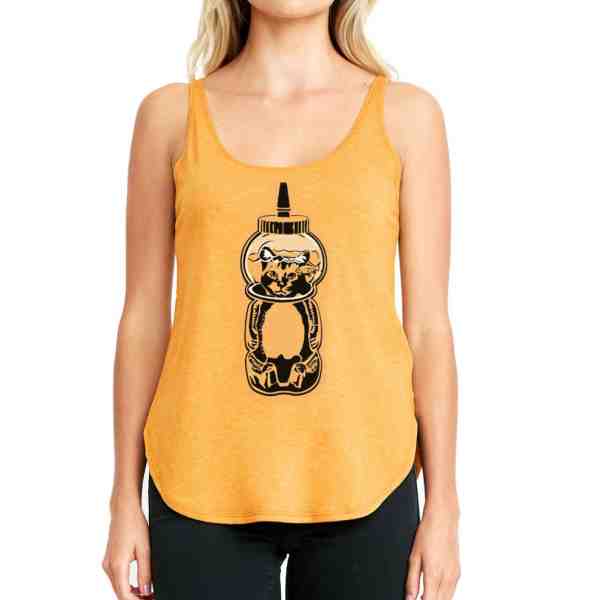
At Handshucked Designs, we rely on vinyl for our intricate “Lost Cat” series. The material holds up beautifully through multiple uses while capturing all those delightful details that make our art special.
Freezer Paper for Fabric Stencils
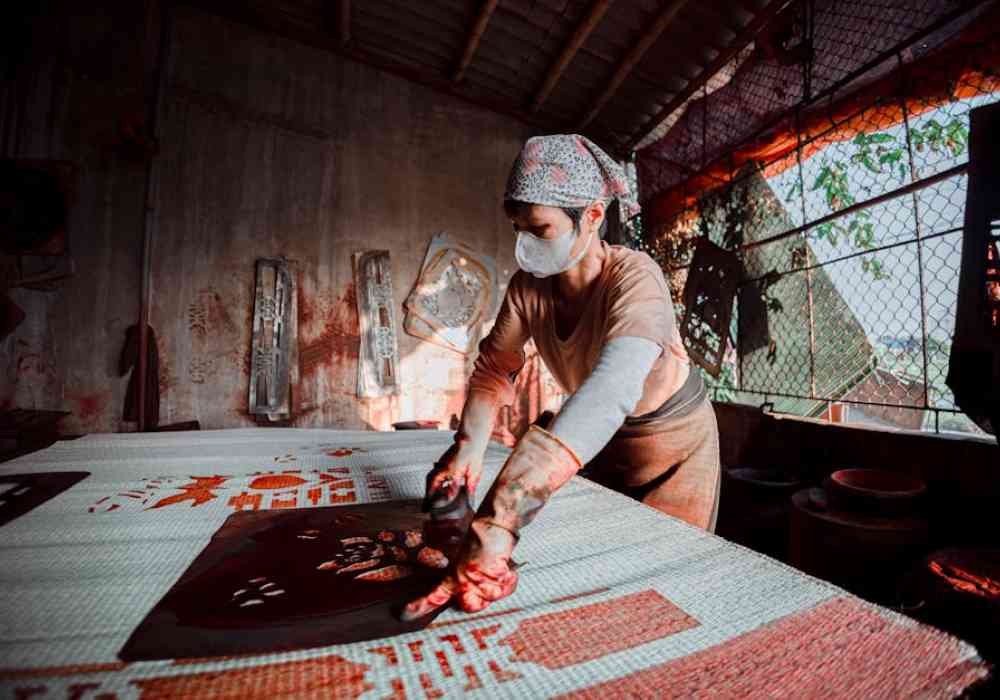
When we’re printing our apparel down here in Key West, freezer paper becomes our best friend. It has this magical waxy side that temporarily sticks to fabric when you iron it, creating a seal that keeps paint exactly where you want it.
The first time I used freezer paper on a t-shirt, I was amazed at how clean the edges came out. It’s affordable too, making it perfect for those fabric projects where you want professional-looking results without breaking the bank.
Mylar for Precision Work
For the most detailed pieces in our “Hungry Manatee” series, nothing beats Mylar. This clear, sturdy plastic lets you see exactly where you’re placing your cuts and stands up to repeated use.
What makes Mylar special is how it resists tearing even with intricate designs. When you’re cutting tiny details (like the whiskers on our Buddha Cat), that resilience is priceless.
Essential Tools Checklist:
Beyond your stencil material, you’ll need quality tools to bring your vision to life. Here’s what should be in your stencil art toolkit:
Cutting Tools: An X-Acto knife with #11 blades is the gold standard. Keep extras on hand – a dull blade is the enemy of clean lines!
Cutting Surface: A self-healing cutting mat protects both your table and your blade. Aim for at least 12” x 18” to give yourself plenty of workspace.
Adhesives: Low-tack tape (painter’s or masking) secures your stencil, while spray adhesive gives you more uniform contact for detailed work.
Paint Application: Depending on your project, you’ll want spray paint, acrylic paint, and various applicators like sponges, brushes, or rollers.
Safety Gear: Don’t skip the respirator mask and gloves, especially when working with spray paint. Your lungs will thank you!
One of our favorite stencil artists from Stock Island jokes, “I’m lucky enough that I can make my initials with just one letter.” The rest of us need to be more methodical! I’ve learned to change X-Acto blades frequently – sometimes using 3-5 fresh blades for a single complex stencil. It might seem excessive, but those clean cuts translate directly to crisp, professional-looking art.
When we’re preparing for a new run of our hand-printed apparel at Handshucked, we make sure to stock up on all these supplies. There’s nothing worse than being in the creative zone only to realize you’re out of blades or your tape has lost its stick!
How to create stencil art starts with setting yourself up for success. Quality materials might cost a bit more upfront, but they’ll save you time, frustration, and ultimately deliver better results that you’ll be proud to display.
Choosing Your Design for Stencil Art
Selecting the right design is perhaps the most crucial step in how to create stencil art. The best stencil designs balance visual impact with practical considerations for cutting and painting.
Finding Inspiration
When I’m working on new designs at Handshucked, I often find myself drawn to the vibrant street scenes of Key West, vintage toys, and the gentle giants of our waters that inspired our “Hungry Manatee” series. Your own inspiration might bubble up from unexpected places—maybe it’s a personal photograph that captures a special moment, or a vintage advertisement with that perfect retro vibe. I’ve seen amazing stencil art inspired by everything from street signs to seashells, pop culture icons to abstract patterns.
The world around you is full of potential stencil designs just waiting to be finded. Sometimes I’ll be walking through Bahama Village and spot a shadow or silhouette that immediately makes me think, “That would make an incredible stencil!”
Understanding Stencil Design Constraints
Not every image translates well to a stencil—this is something I learned the hard way when first developing our WTFishbowl series. Let me share what I’ve finded along the way.
Simplicity vs. Complexity
“If you’re new to stenciling, a basic design is less likely to overwhelm,” a fellow artist once told me, and it’s advice I still pass on today. Start with simpler designs featuring bold shapes and clear outlines. You’ll be amazed how much impact even a straightforward design can have.
I remember when we first started our WTFishbowl series—the designs were relatively simple compared to the intricate Buddha Cat and Lucky Cat iterations our customers love today. Those early designs gave us the confidence and skills to tackle more complex work. There’s something to be said for mastering the basics before diving into the deep end.
High Contrast is Key
Stencils absolutely love high-contrast images. When I’m selecting or creating a design, I’m always looking for clear distinctions between light and dark areas. Images with too many gradients or subtle shading can be nightmares to translate into stencils.
Consider how your image will look in silhouette form—this is essentially what you’re creating with a stencil. Sometimes I’ll use photo editing software to bump up the contrast on an image before converting it to a stencil design. This simple step can make cutting and painting so much easier down the line.
Understanding Bridges and Islands
One concept that took me a while to fully grasp when starting out was the importance of “bridges” and “islands” in stencil design.
Bridges are those thin connections that keep “islands” (isolated parts of your design) attached to the main stencil. Without bridges, these islands would simply fall out when you cut the stencil, leaving holes where you wanted design elements.
“The easiest way to understand bridges is to think of the letter O - without bridges, the middle would fall out.”
This is exactly right. If you’re cutting a stencil of the letter “O,” you’ll need bridges to keep the center connected to the outer ring. These bridges will appear as thin lines in your final artwork, so I always try to place them strategically—perhaps where they’ll be less noticeable or where they might even improve the design.
Planning for Multiple Layers
For complex, multi-color designs like those we create for our art prints in Bahama Village, you’ll need to think in layers. Each color typically requires its own stencil, which means considering:
How colors will overlap with each other, registration marks to help you align multiple stencils precisely, and the order of application (I usually work from lightest to darkest colors).
This layered approach might seem daunting at first, but it’s what allows for those rich, multi-dimensional stencil artworks that catch the eye and hold attention.
Preparing Your Design
Once you’ve selected an image that speaks to you, it’s time to prepare it for stenciling. This preparation stage is where the magic happens—where art meets technical consideration.
First, adjust the contrast to create clear boundaries between areas that will be cut and those that will remain. Then simplify by removing unnecessary details that would be difficult to cut or wouldn’t translate well in the final piece.
Next comes the crucial step of adding bridges to any “islands” in your design. When we developed our “Lost Cat” series, I spent hours making sure these bridges were placed just right—visible enough to hold the stencil together but subtle enough not to distract from the overall design.
Make sure to size appropriately, considering both the surface you’ll be painting on and the level of detail you can reasonably cut. Finally, print or trace your design on regular paper first to test the size and composition before transferring to your stencil material.
This planning stage might not be the most glamorous part of creating stencil art, but it’s often what separates a good stencil from a great one. Take your time here—your future self will thank you when cutting and painting go smoothly!
How to Create Stencil Art: Step-by-Step Guide
Now that you’ve gathered your materials and selected the perfect design, it’s time to roll up your sleeves and dive into the actual process of how to create stencil art. I’ve spent countless hours perfecting this technique at Handshucked Designs, and I’m excited to share our studio secrets with you.
Creating a Basic Vinyl Stencil
The magic begins with preparation. If you’re starting with a digital image, print it first on regular paper to check that the size and composition work for your project. For vinyl stencils, use an inkjet printer rather than laser (which can actually melt the vinyl—trust me, I learned this the hard way!). If your printer isn’t compatible with vinyl, simply print on paper and trace the design using a permanent marker.
For hand-drawn designs, you can either draw directly onto the vinyl with a permanent marker or create your design on paper first and then transfer it. I often sketch ideas for our “Lost Cat” series on paper before committing them to vinyl, which gives me flexibility to adjust details.
To transfer your design to vinyl, place your printed design on top of the vinyl sheet and secure it with low-tack tape to prevent shifting. Carefully trace the design using a permanent marker, then remove the paper template and make sure all lines are clearly visible. This becomes your cutting guide.
When cutting your stencil, always place the vinyl on your cutting mat first. Begin with interior details and work your way outward—this prevents you from accidentally leaning on and damaging delicate interior cuts. Use a fresh, sharp X-Acto knife and hold it perpendicular to your surface. Apply consistent pressure and cut with smooth, continuous motions rather than short, jerky movements.
For curves (which we use a lot in our “Hungry Manatee” designs), try rotating the cutting mat rather than twisting your wrist. This technique produces smoother lines and is easier on your hand during long cutting sessions.
Remember to preserve any “islands” in your design by creating bridges. Without these connectors, isolated parts of your design would simply fall out. For example, when cutting a letter “O,” you need small bridges to keep the center attached to the outer ring.
Once your cutting is complete, carefully lift the stencil and check for any missed cuts or areas that need refinement. At our studio, we always test stencils on scrap material before applying them to final products. This quick test can save you from disappointment later.
Tips for Cutting Stencil Designs Accurately
Precision cutting is what separates amateur stencil art from professional work. The quality of your cuts directly affects the crispness of your final image, so don’t rush this step.
Sharp blades are absolutely essential. At Handshucked Designs, we start each new stencil with a fresh blade and change it as soon as we feel increased resistance. For complex designs like our Buddha Cat stencils, we might use 3-5 blades per stencil. Yes, it seems excessive, but blades are cheap compared to the frustration of torn vinyl or jagged edges.
“Be prissy about your blades—they’re cheap to replace and make all the difference in terms of the precision of your cuts.”
Your cutting technique matters just as much as your tools. Hold the knife like a pencil for maximum control, but cut with your arm rather than just your wrist to create smoother lines. Pull the knife toward you for straight lines and use shorter, controlled strokes for detailed areas. Consistent pressure throughout each cut helps create clean edges.
Patience truly is a virtue when creating stencil art. Take breaks to rest your hand and eyes, especially when working on intricate designs. Work in good lighting so you can see details clearly, and don’t rush—a well-cut stencil can be used many times, so the effort pays off.
Always prioritize safety when cutting: cut away from your body, keep fingers well away from the cutting path, and consider using cut-resistant gloves if you’re working on particularly complex designs.
Applying Paint Without Smudging or Bleeding
This is where your stencil transforms from a cut piece of vinyl into a striking work of art. The key to clean, professional results starts with properly securing your stencil. Clean the surface you’ll be painting on, position your stencil exactly where you want it, and secure all edges with painter’s tape. For extra security, especially on textured surfaces, use a light spray adhesive on the back of the stencil.
Different surfaces require different paints. For walls and canvas, acrylic or spray paint works beautifully. For fabric projects (like our hand-printed apparel line), use permanent fabric paint—regular paint will wash out. Wood projects need acrylic, spray paint, or wood stain, while glass or ceramics require special formulated paints.
When applying spray paint, shake the can thoroughly—at least two full minutes. Hold the can about 9-12 inches from the surface and apply in light, even passes rather than heavy coats. I start spraying before reaching the stencil and continue past it for the smoothest application. Building up 2-3 light coats rather than one heavy coat prevents drips and bleeding.
For brush or sponge application, less is more. Use minimal paint to avoid seepage under the stencil, dabbing excess paint on a paper towel before applying. Use a gentle stippling (up-and-down) motion rather than brushing across, and work from the edges of the stencil inward. Building up color gradually with thin coats gives you more control over the final result.
To prevent bleeding and smudging, make sure your stencil is completely flat against the surface. Use minimal paint, building up in thin layers, and allow each layer to dry before applying more. For fabric stencils, I always place cardboard between layers to prevent bleed-through.
When removing your stencil, timing is everything. Allow the paint to set but not completely dry (about 30 seconds for spray paint), then carefully peel back the stencil at a 45-degree angle. Lift straight up rather than dragging across the surface to avoid smudging. If you’re using multiple colors, let each color dry completely before applying the next stencil.
The beauty of stencil art lies in its versatility. Whether you’re creating street art-inspired pieces like our WTFishbowl series or personalizing home décor, these fundamental techniques will serve you well. With practice, you’ll develop your own style and signature techniques—just like we’ve done at Handshucked Designs.
Making a Fabric Stencil Using Freezer Paper
Creating stencil art on fabric opens up a whole new world of possibilities for your creativity. Here at Handshucked Designs, we’ve spent years perfecting this technique for our hand-printed apparel that you’ll find throughout Key West and Stock Island.
The Freezer Paper Method
The secret to beautiful fabric stencils? Freezer paper. This kitchen staple has a waxy coating on one side that works like magic when you apply heat. The wax temporarily sticks to fabric, creating a tight seal that keeps paint exactly where you want it.
I remember the first time I tried this technique on one of our early “Lost Cat” designs. The clean lines and crisp edges were a game-changer compared to my previous attempts with tape and cardboard.
Materials Needed:
You probably have most of what you need already. Grab some freezer paper from the grocery store (look near the aluminum foil), your iron, fabric paint, a few sponge brushes or foam rollers, and some cardboard to slip inside your garment. You’ll also need your trusty X-Acto knife and cutting mat, plus your design printed on the non-waxy side of the freezer paper.
Step 1: Prepare Your Design
Start by printing or tracing your design onto the matte side of the freezer paper—that’s the side without the waxy coating. Place it on your cutting mat with the matte side facing up, then carefully cut out your design using the X-Acto knife.
When we create our Buddha Cat designs, we take extra care with the intricate details around the eyes and whiskers. Remember those bridge concepts we talked about earlier? They’re especially important here to keep all your design elements connected.
Step 2: Iron the Stencil onto Fabric
Pre-washing your fabric is a small step that makes a big difference. It removes any factory finishes that might interfere with your paint adhering properly.
Next, slip some cardboard inside your garment to prevent the paint from bleeding through to the back. Position your freezer paper stencil with the waxy side down against the fabric—this is crucial! The waxy side needs to touch the fabric for the magic to happen.
Set your iron to medium heat (no steam!) and press firmly onto the freezer paper for about 10-15 seconds in each area. Work in sections until the entire stencil is adhered to the fabric.
“For fabric stencils, ensure you iron the freezer paper with the correct orientation (matte side up) to avoid adhesion issues.”
You’ll know you’ve done it right when the edges of your stencil feel completely sealed against the fabric. Run your finger along the edges—if any part lifts, give it another quick press with the iron.
Step 3: Apply Fabric Paint
Now for the fun part! Grab your fabric paint and a sponge brush or foam roller. The technique here is different from painting on a canvas—instead of brushing, you’ll want to use a gentle dabbing or stippling motion.
Start from the outer edges and work your way inward. This helps prevent paint from being pushed under the stencil edges. Apply thin, even coats rather than glopping on one thick layer. Patience pays off here—thin layers might take a bit longer, but they’ll give you much cleaner results.
When we’re creating our “Hungry Manatee” series on tote bags, we often let the first layer dry for about 30 minutes before adding a second coat for more vibrant color.
Step 4: Remove the Stencil
Timing is everything when removing your stencil. Wait until the paint is dry to the touch but not completely cured—usually about 30-60 minutes depending on the paint and how thickly you applied it.
Carefully peel away the freezer paper, starting at one corner and pulling slowly. If you meet any resistance or see that the paint is still too wet, stop and give it more drying time.
After removing the stencil, you’ll need to heat-set the paint according to the manufacturer’s instructions. This is typically done by ironing the back side of the fabric or running it through a hot dryer. Allow the paint to fully cure (usually 72 hours) before washing the item.
Preventing Bleed-Through on Fabric
The most common frustration with fabric stenciling is paint bleeding under the edges. Here’s how we avoid it at Handshucked Designs:
First, always place cardboard or additional freezer paper inside the garment. This prevents paint from soaking through to the back side. Use fabric paint specifically designed for your fabric type—regular acrylic paint might look great at first but will crack and fade after washing.
Apply paint sparingly in thin layers. It’s tempting to load up your brush for bold color, but this almost guarantees bleeding. Use a dabbing motion rather than brushing strokes that can push paint under the stencil. Most importantly, ensure complete adhesion between the freezer paper and fabric before you start painting.
We’ve used this technique to create everything from our signature designs on t-shirts to custom tote bags and even home décor items like pillowcases. The freezer paper method gives us professional results that look handcrafted but not homemade—exactly the vibe we aim for with all our Handshucked Designs products.
Give this technique a try, and you might find yourself, like us, constantly looking around thinking, “I could put a stencil on that!”
Creative Uses of Stencils in Art Projects
The beauty of stencil art lies in its incredible versatility. Once you’ve mastered how to create stencil art, a whole world of creative possibilities opens up before you. At Handshucked Designs, we’ve found countless ways to incorporate stenciling techniques into projects that bring color and personality to everyday items.
Home Décor Applications
There’s something deeply satisfying about changing your living space with art you’ve created yourself. Stenciling allows you to personalize your home in ways that mass-produced décor simply can’t match.
Imagine walking into a room where an accent wall captures everyone’s attention with a bold, stenciled pattern that perfectly complements your style. Or picture that tired old side table, reborn through furniture upcycling with a stenciled design that makes it look like a boutique find rather than a garage sale rescue.
In our Key West studio, we’ve seen customers transform everything from lampshades (where light filters through creating magical patterns) to throw pillows that add a personal touch to living spaces. One of my favorite projects involved helping a local bed and breakfast create custom floor cloths using canvas drop cloths and a series of nautical-themed stencils that captured the maritime history of the Keys.
Clothing Customization
Nothing expresses individuality quite like wearing art that speaks to your personality. Fabric stenciling opens up endless possibilities for creating wearable art that’s uniquely yours.
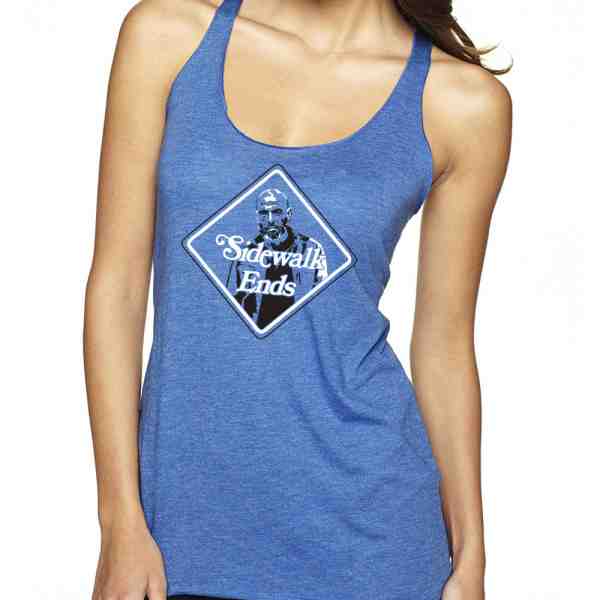
Our hand-printed apparel line has become something of a local phenomenon around Key West. Visitors and locals alike recognize our Lost Cat series on t-shirts and hoodies as they stroll through Bahama Village or Stock Island. The joy of stenciled clothing is that each piece carries slight variations that remind you it was made by human hands, not machines.
Beyond t-shirts, we’ve had customers transform plain canvas tote bags into conversation pieces, add personality to shoes with small stenciled details, and even create dramatic statement jackets that combine multiple stencil layers for truly one-of-a-kind fashion.
Wall Art and Installations
“I have made several life-long friends simply because we share a passion for cutting tiny holes in paper,” a veteran stencil artist once told me, highlighting the community that forms around this art form. This sense of connection often extends to the viewers who engage with larger stencil works.
Stencils allow artists to create impressive pieces that can transform public and private spaces alike. In our gallery, we display canvas art that uses layered stencils to create depth and complexity that surprises visitors who thought they understood the limitations of stencil techniques.
The connection between stenciling and street art is well-established, with artists like Banksy bringing the medium into the mainstream. Many of our designs at Handshucked draw inspiration from this tradition while adding our own Florida Keys twist. We’ve even contributed to several murals around town, combining stenciled elements with freehand techniques for large-scale impact.
For those looking to push boundaries, mixed media art offers exciting possibilities. We’ve experimented with incorporating stencils alongside collage, painting, and even photography to create pieces that defy easy categorization.
Practical Applications
Beyond pure aesthetics, stencils solve practical problems with style. Need custom signage for your small business? A well-designed stencil can help create consistent branding across multiple signs. Want to upgrade your organization system? Stenciled labels add both function and beauty.
We’ve had customers use our techniques to create personalized gift wrap that makes presents special before they’re even opened, and custom greeting cards that recipients treasure long after birthdays or holidays have passed.
Inspiration from Handshucked Designs
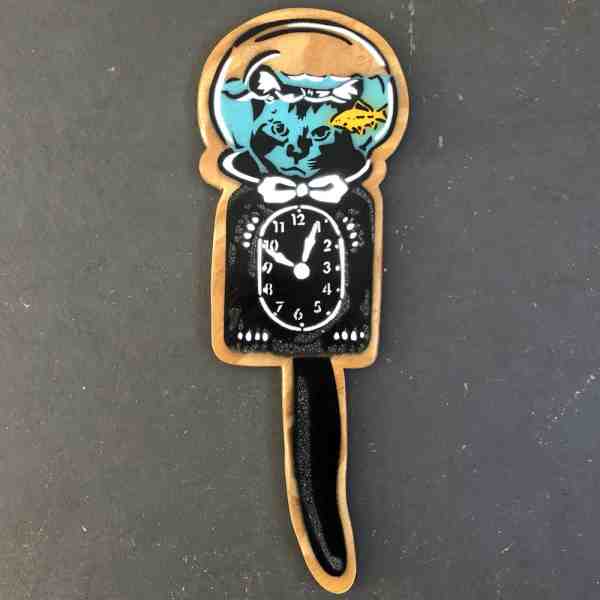
Our own artistic journey at Handshucked has been deeply influenced by stencil techniques. Our “Hungry Manatee” collection and the ever-popular WTFishbowl series (including Buddha Cat and Lucky Cat) demonstrate how stencils can help develop a distinctive, recognizable style.
These designs have become synonymous with the quirky, vibrant culture of Key West itself. You can explore our Art Section to see how we’ve incorporated stencil techniques into our unique artistic vision.
Creating Multi-Layer Stencils for Complex Designs
Once you’ve mastered basic stenciling, multi-layer techniques open up a whole new dimension of possibilities. This advanced approach allows you to create complex, richly detailed pieces with depth and nuance that single-layer stencils simply can’t achieve.
Planning Multi-Layer Stencils
The secret to successful multi-layer stencil art lies in thoughtful planning. First, you’ll need to break your design into distinct color layers, carefully considering how colors will interact where they overlap. Generally, you’ll want to work from lightest to darkest colors, building up complexity as you go.
The most crucial element of multi-layer work is proper alignment. Adding registration marks—small crosses or dots outside your design area—gives you reference points to ensure each layer lines up perfectly. These marks should appear on every stencil in exactly the same position.
Cutting Multiple Stencils
Creating separate stencils for each color requires patience and precision. Label each stencil with its color and application order to avoid confusion during the painting process. I’ve learned the hard way that few things are more frustrating than mixing up stencil layers halfway through a complex project!
Application Process
When applying multi-layer stencils, patience becomes your greatest virtue. Start with the lightest color, usually the background, and allow it to dry completely before moving to the next layer. Careful alignment using your registration marks ensures that each new element fits perfectly into your emerging design.
At Handshucked, our more complex pieces often use 3-5 layers of stencils. Our WTFishbowl series, for instance, requires multiple carefully aligned layers to achieve the depth and vibrant character that our customers have come to love.
The real magic of multi-layer stenciling happens when you remove that final layer and see all the elements come together into a cohesive whole. It’s a revealing moment that never loses its thrill, even after years of practice.
Vinyl vs. Freezer Paper: Choosing the Right Material
When I first started creating stencil art at Handshucked Designs, I quickly learned that choosing the right material makes all the difference in achieving professional results. Each stencil material has its own personality and purpose – understanding these differences will help you select the perfect match for your project.
When to Use Vinyl Stencils
Vinyl has become my go-to material for most of our hard-surface projects in the studio. There’s something satisfying about cutting into a sheet of vinyl – it offers just the right amount of resistance against your blade while allowing for incredibly precise details.
Vinyl shines brightest when:
- You need a stencil that will last through multiple uses (we’ve gotten 20+ applications from a single well-made vinyl stencil)
- You’re working on non-porous surfaces like walls, canvas, or wood
- Your design contains intricate details that would be lost in a less sturdy material
- Your project might encounter moisture or humidity
- You’re creating something for professional or commercial use
When we’re working on our “Lost Cat” series at Handshucked, we almost always reach for vinyl because the fine details in the whiskers and eyes require that precision. The ability to wipe clean and reuse these stencils also makes vinyl cost-effective for our production runs.
“You should make painting stencils out of Mylar or other plastic if you want to reuse them,” advises Laura M. Johnson, a mural artist. “The problem with using paper, cardboard, or even wood is that they are usually one-time use stencils because they will soak up the paint.”
When to Use Freezer Paper Stencils
The first time I ironed freezer paper onto fabric, it felt like magic – this ordinary kitchen supply temporarily bonds to textiles when heated, creating a perfect seal for crisp edges.
Freezer paper becomes the hero when:
- You’re customizing fabric items like t-shirts, tote bags, or pillowcases
- You only need to use the stencil once or twice
- You want the stencil to stay in place without tape or spray adhesive
- You’re working with fabric paints
- You’re on a tight budget or need materials you can find locally
For our hand-printed apparel line, freezer paper has become indispensable. The way it temporarily adheres to fabric when ironed creates a seal that prevents paint from bleeding under the edges – a common problem with other stencil methods on textiles.
Comparing Material Performance
| Feature | Vinyl | Freezer Paper |
|---|---|---|
| Best For | Hard surfaces (walls, canvas, wood) | Fabric and textiles |
| Adhesion | Requires tape or spray adhesive | Temporarily adheres when ironed |
| Durability | High - can be used 20+ times | Low - typically 1-3 uses |
| Flexibility | Less flexible, can curl | More flexible, lies flat |
| Detail Capacity | Excellent for fine details | Good, but less precise than vinyl |
| Cleanup | Can be wiped clean and reused | Single-use, disposed after |
| Cost | Higher initial investment | Lower cost, readily available |
| Water Resistance | Excellent | Poor - breaks down when wet |
Other Stencil Materials to Consider
While vinyl and freezer paper cover most of our needs at Handshucked Designs, we occasionally branch out to other materials for special projects.
Mylar has become our secret weapon for our most detailed work, especially in the “Hungry Manatee” series. This transparent, durable plastic allows for incredible precision and holds up beautifully to repeated use. The transparency is particularly helpful when aligning multiple layers.
Acetate performs similarly to Mylar but with slightly less durability. We sometimes use it for prototyping before committing to a final design in Mylar or vinyl.
Cardstock might seem basic, but it’s perfect for simple, one-time applications when you need something quick and easy. The stiffness makes it easier to handle than regular paper, though it will absorb paint and can’t be reused.
Contact paper comes with its own adhesive backing, making it ideal for curved surfaces where tape might not hold well. We’ve used it for decorating cylindrical objects like vases.
Frisket film is what professional airbrush artists often use for extremely detailed work. It’s more expensive than other options but offers unparalleled precision for special projects.
The material you choose becomes part of your artistic voice. At Handshucked, we primarily use vinyl for our hard surface applications and freezer paper for our textile work, but we’re always experimenting with different materials to achieve just the right effect for each piece we create.
Caring for and Cleaning Your Stencils
After you’ve created the perfect stencil, proper maintenance becomes your next priority. At Handshucked Designs, we’ve learned through trial and error that caring for stencils isn’t just about tidiness—it directly impacts the quality and consistency of your art over time.
Cleaning Methods for Different Materials
The way you clean your stencils depends largely on what they’re made of. Those vinyl stencils you spent hours cutting deserve special attention to preserve their crisp edges and fine details.
For vinyl and plastic stencils, timing is everything. Don’t wait until that spray paint has fully cured before cleaning! I always clean mine immediately after use, when the paint is still wet enough to wipe away easily. A damp cloth usually does the trick for fresh paint, but for stubborn spots, a gentle soak in warm, soapy water works wonders.
When dealing with detailed stencils like our “Lost Cat” series, I keep an old soft toothbrush handy to gently scrub between tiny cut spaces without damaging the bridges. Just be careful with chemical cleaners—they might seem effective in the moment, but they can break down your vinyl over time, making it brittle and prone to tearing.
Freezer paper stencils are generally one-and-done tools, but occasionally you might want to preserve one for a second use. The key here is gentle handling during removal. Slowly peel it from your fabric after use, keeping it as dry as possible. Unlike vinyl, freezer paper and water aren’t friends—moisture will quickly destroy the structure that makes these stencils useful.
Proper Storage Techniques
How you store your stencils between projects dramatically affects their lifespan. At our Key West studio, we learned this lesson the hard way after finding some of our favorite designs curled beyond repair after improper storage.
Always store stencils flat to prevent warping. This might seem obvious, but it’s easy to quickly roll one up “just for now” and forget about it for weeks. I use old art portfolios to keep stencils organized by project or size, which makes finding the right one much easier when inspiration strikes.
For multi-layer stencils like those we use in our “Hungry Manatee” series, we store each layer separately with clear labeling. This prevents confusion and saves time when setting up for the next print session.
Heat is the enemy of stencil materials, so keep them away from sunny windows, radiators, or hot attics. In our humid Key West climate, we’ve also found that placing wax paper between stencils prevents them from sticking together—a simple trick that has saved countless hours of careful separation work.
Extending Stencil Life
To get the maximum mileage from your stencils, especially those intricate designs that took hours to cut, a few preventative measures go a long way.
Always handle stencils with clean hands—the oils from your skin can affect paint adhesion over time. When applying paint, work with a light touch to minimize overspray and buildup on the stencil itself. How to create stencil art effectively includes these maintenance habits that might seem small but make a huge difference in the long run.
I’ve found that cleaning after each use rather than allowing paint to accumulate keeps stencils in better condition. Even a single session of neglect can lead to paint buildup that distorts edges and blocks fine details.
For small tears or cuts that happen during use or storage, clear tape works as a quick repair solution. For those delicate bridges that might break with repeated use, a thin line of hot glue along the back side adds structural support without affecting the stencil’s performance.
When to Replace Your Stencils
Even with meticulous care, stencils have a finite lifespan. Knowing when to retire a stencil saves you from disappointing results and frustration.
Watch for edges becoming fuzzy or imprecise—this is usually the first sign that your stencil is past its prime. If paint consistently builds up despite your best cleaning efforts, or if bridges are breaking despite repairs, it’s probably time for a fresh cut.
Material becoming brittle or inflexible is another clear indicator, especially with vinyl stencils that have been exposed to paint thinners or harsh cleaning agents. When your results start showing inconsistencies or bleeding that wasn’t happening before, don’t waste time trying to salvage a worn-out stencil.
At Handshucked Designs, we track how many times we’ve used our most popular stencils and proactively replace them before quality issues arise. It might seem excessive to retire a stencil that still “works,” but maintaining consistent quality across our hand-printed apparel and art prints is worth the extra effort.
The time you invest in caring for your stencils pays dividends in consistent, professional results—and saves you from having to recut complex designs more often than necessary.
Frequently Asked Questions about How to Create Stencil Art
Can I use paper to make stencils instead of plastic?
Paper stencils are definitely possible, but they come with some trade-offs. Regular paper quickly becomes a soggy mess when paint hits it, making it strictly a one-time affair.
If you’re set on using paper, opt for heavyweight cardstock or poster board instead. You can even extend its lifespan slightly by applying a thin coat of clear acrylic sealer before use. Just be prepared to toss it after your project is complete.
Laura M. Johnson, a mural artist, puts it bluntly: “The problem with using paper, cardboard, or even wood is that they are usually one-time use stencils because they will soak up the paint.”
At Handshucked Designs, we sometimes use a paper-based hack for quick prototypes that works surprisingly well:
Cover both sides of regular paper with clear packing tape, then draw or print your design on this waterproofed surface. Cut as usual, and the tape barrier gives you a few extra uses before replacement. It’s not perfect, but it works in a pinch when you’re feeling creative and don’t have proper materials on hand.
What are the best materials for making reusable stencils?
When durability matters, four materials stand out from the crowd:
Mylar is the gold standard for serious stencil artists. This clear polyester film offers the perfect balance of durability and precision. We recommend 5-7 mil thickness for most projects – thin enough to cut detailed designs but sturdy enough to withstand repeated use.
Vinyl might be slightly less transparent than Mylar, but it makes up for it with exceptional durability. The standard 7 mil thickness works beautifully for most how to create stencil art projects.
Acetate offers good transparency which helps with placement, though it won’t last quite as long as Mylar or vinyl. It’s a solid middle-ground option.
Stencil Film is purpose-made for this exact job, often featuring an adhesive backing that makes application a breeze. It’s worth the investment for frequent stencilers.
At Handshucked Designs, our most intricate and frequently used stencils in the “Lost Cat” and “Hungry Manatee” series are almost exclusively cut from Mylar. After countless applications, the fine details in Buddha Cat’s whiskers and the Hungry Manatee’s textured skin remain crisp and defined.
How do I prevent paint from bleeding under the stencil?
Bleeding edges can transform your masterpiece into a muddy disappointment. Fortunately, with the right techniques, you can achieve those satisfyingly crisp lines every time.
First, proper stencil security is non-negotiable. Your stencil must lie completely flat against the surface with no gaps where paint could sneak underneath. Take extra time securing it properly – this step alone prevents most bleeding issues.
Less is more when it comes to paint application. Beginning stencilers often make the mistake of loading up their brush or spraying too heavily. Start with less paint than you think you need and build up gradually in thin layers. Your patience will be rewarded with sharper edges.
Your application technique matters tremendously. With spray paint, use light, even passes from 9-12 inches away. For brushes or sponges, dab rather than stroke, working from the edges inward to prevent pushing paint under the stencil.
Consider using temporary spray adhesive for an even tighter seal between your stencil and surface. This extra step can make a remarkable difference in edge quality.
Always blot excess paint from brushes or sponges before touching your stencil. A paper towel works perfectly for this – better to make multiple light applications than risk one heavy, bleed-prone coat.
For fabric stencils using freezer paper, proper ironing is crucial. That waxy coating needs to create a complete seal with the fabric to prevent bleeding.
“Apply the medium lightly; loading too much can lead to messy results. Always dab on a scrap paper first,” as one of our artist friends likes to say.
At Handshucked Designs, we sometimes employ a special trick for our most detailed pieces: applying a light coat of the background color along the stencil edges first. This creates a seal that helps prevent bleeding when applying the main color – a small extra step that significantly improves the final result of your how to create stencil art projects.
Conclusion
How to create stencil art is a journey that combines precision with creativity, technical skill with artistic vision. From ancient handprints decorating cave walls to the vibrant street art that colors our modern cities, stencils have remained a powerful artistic tool for over 30,000 years.
Throughout this guide, we’ve walked through every aspect of stencil creation - selecting materials that match your project needs, choosing designs that will translate well to the medium, mastering cutting techniques that preserve detail, and applying paint with control for professional results.
At Handshucked Designs, stencil techniques have shaped our artistic identity. Our “Lost Cat” series wouldn’t have the same crisp edges and bold silhouettes without the precision that stencils provide. The WTFishbowl collections, featuring Buddha Cat and Lucky Cat, rely on careful layering of stencils to achieve their distinctive look. Even our playful “Hungry Manatee” artwork benefits from the clean lines and reproducibility that stencil methods offer.
“Go once in the street with a spray can. Spray your signature. Then go back the day after to see. I’m sure you’ll go back. Because when you leave something in the street, you leave a part of yourself.” - Blek le Rat
This quote perfectly captures what makes stencil art so compelling. It’s not just about mastering a technique - it’s about expressing yourself and leaving your mark on the world, whether that’s on a canvas in your living room or a t-shirt that carries your design through the streets of Key West.
I encourage you to start simple with your first stencil projects. Be patient with yourself as you learn to make clean cuts and apply paint evenly. Every stencil artist, even those whose work now sells in galleries, began with basic designs and gradually built their skills.
The beauty of stencil art lies in its democratic nature - it welcomes beginners with open arms while continuing to challenge and inspire experienced artists. As you develop your skills, you’ll find that sometimes the small imperfections add character and authenticity to your work. As we often say when teaching stencil workshops in our Key West studio: “If you don’t like it, paint over it and try again.”
For inspiration on your stencil journey, visit our Art Section to see how we’ve incorporated these techniques into our work. You’ll notice how we’ve used stencils not just for standalone art pieces, but also to create consistent designs across different mediums - from prints to t-shirts to tote bags.
Whether you’re creating art for your home, customizing clothing, or beginning a journey into street art, stencils offer an accessible yet limitless medium for artistic expression. The techniques might be thousands of years old, but the possibilities for innovation are endless.
Now it’s your turn to cut, spray, and amaze the world with your stencil creations!